This is a bonus post following on from my Understanding MCP Authorization three part series covering building (and understanding) an MCP HTTP based server and implementing the MCP Authorization spec (2025-06-18). In the previous series, we built the server side of the spec, leaving the client side up to the reader since obtaining OAuth clients is usually fairly opinionated in enterprise environments.
The MCP Authorization spec actually has opinions about how MCP clients (and thus, OAuth clients) should be created. The idea behind the spec is to allow MCP clients and servers to be “plug and play” automatically. That is, allow any MCP client to automatically discover what it needs to connect to an MCP server.
In this blog post, we implement an MCP client with Dynamic Client Registration for the OAuth client.
This series of blog posts (three parts + source code), walks “step-by-step” through the latest MCP Authorization spec and implement it. I have made all of the source code for each of the steps available on GitHub.
- Part 1: Implement a spec compliant remote MCP server with HTTP Transport
- Part 2: Layer in Authorization specification with OAuth 2.1
- Part 3: Bring in a production Identity Provider (Keycloak)
Follow (@christianposta or /in/ceposta) for the next parts.
Building an MCP Client
Follow along with the source code for this step.
The MCP client we build for this blog will focus on Dynamic Client Registration following RFC 7591. The process starts when an MCP client makes a request for a resource it is not authenticated for (HTTP 401). In that case, the MCP server would return a header WWW-Authenticate to help the MCP client figure out how to authenticate.
From the spec:
MCP servers MUST use the HTTP header WWW-Authenticate when returning a 401 Unauthorized to indicate the location of the resource server metadata URL as described in RFC9728 Section 5.1 “WWW-Authenticate Response”.
MCP clients MUST be able to parse WWW-Authenticate headers and respond appropriately to HTTP 401 Unauthorized responses from the MCP server.
In our implementation in step10, we built the MCP server to return a 401 and Header:
WWW-Authenticate: Bearer realm="mcp-server", resource_metadata="http://localhost:9000/.well-known/oauth-protected-resource"
Note this part in the value of the header: resource_metadata=”http://localhost:9000/.well-known/oauth-protected-resource.
The MCP client will then request the oauth-protected-resource metadata (following RFC 9728).
In our MCP server, it looks like this:
{
  "resource": "http://localhost:9000",
  "authorization_servers": ["http://localhost:8080/realms/mcp-realm"],
  "scopes_supported": [
    "echo-mcp-server-audience",
    "mcp:read",
    "mcp:tools",
    "mcp:prompts"
  ],
  "bearer_methods_supported": ["header"],
  "resource_documentation": "http://localhost:9000/docs",
  "mcp_protocol_version": "2025-06-18",
  "resource_type": "mcp-server"
}
A number of interesting points here. The authorization_servers is where the client should look for how to connect to the Authorization Server (AS). The scopes_supported is how the MCP server tells its clients what scopes it will need to make calls. Interestingly this will be ALL of the scopes needed to access all parts of the MCP server. When the MCP client registers an OAuth client, it should use these scopes. It’s on the AS to determine which users have which roles and what scopes will actually appear in their tokens. When the MCP client initiates an authorization code flow, it should use these scopes.
The next step is to call the Authorization Server’s (AS) metadata resource based on what was in the authorization_servers list. The MCP client will append /.well-known/oauth-authorization-server to the value of authorization_servers to discover the endpoints for authorization, client registration, etc on the Authorization Server (AS). In this case, the metadata is located here:
http://localhost:8080/realms/mcp-realm/.well-known/oauth-authorization-server
In our example, since we are using Keycloak, you’ll note the /realms/<realm-name> here. Other Authorization Servers will be different. When our MCP client calls this and parses the AS metadata, the MCP client should now have enough information to initiate a Dynamic Client Registration and proceed to OAuth flows:
The relevant endpoints in our example:
token_endpoint: http://localhost:8080/realms/mcp-realm/protocol/openid-connect/token
authorization_endpoint: http://localhost:8080/realms/mcp-realm/protocol/openid-connect/auth
registration_endpoint: http://localhost:8080/realms/mcp-realm/clients-registrations/openid-connect
Based on that response, we see that the registration_endpoint is: http://localhost:8080/realms/mcp-realm/clients-registrations/openid-connect. Now our MCP client should make a call to the http://localhost:8080/realms/mcp-realm/clients-registrations/openid-connect endpoint to register the OAuth client. Here’s an example of what that payload should look like:
{
  "client_name": "My Anonymous Client",
  "redirect_uris": ["http://localhost:9090/callback"],
  "grant_types": ["authorization_code"],
  "scope": "mcp:read mcp:tools mcp:prompts echo-mcp-server-audience",
  "token_endpoint_auth_method": "client_secret_basic"
}
It’s important to know that the MCP Authorization spec (at the time of this writing) expects the AS to allow anonymous OAuth client registration (more on this later). The redirect_uris and scope parameters here are important. The scopes we specify here should match what the MCP server publishes in /.well-known/oauth-protected-resource. Additionally, the MCP client will need to be able to get the authorization code from the OAuth server, so registering the callback is critical.
IMPORTANT: note, that before this call can succeed, we will need to allow anonymous client registration in Keycloak. This is disabled by default (for good reason), so to follow along in the MCP Authorization spec, we’ll need to relax this and enable a client to register anonymously. Follow your organization’s security best practices before considering this. See Appendix A of this blog to see how to enable anonymous client registration for the purposes of illustration in this blog.
This will create a new, dynamic client in Keycloak (or associated IdP). See previous blog post for setting up Keycloak.
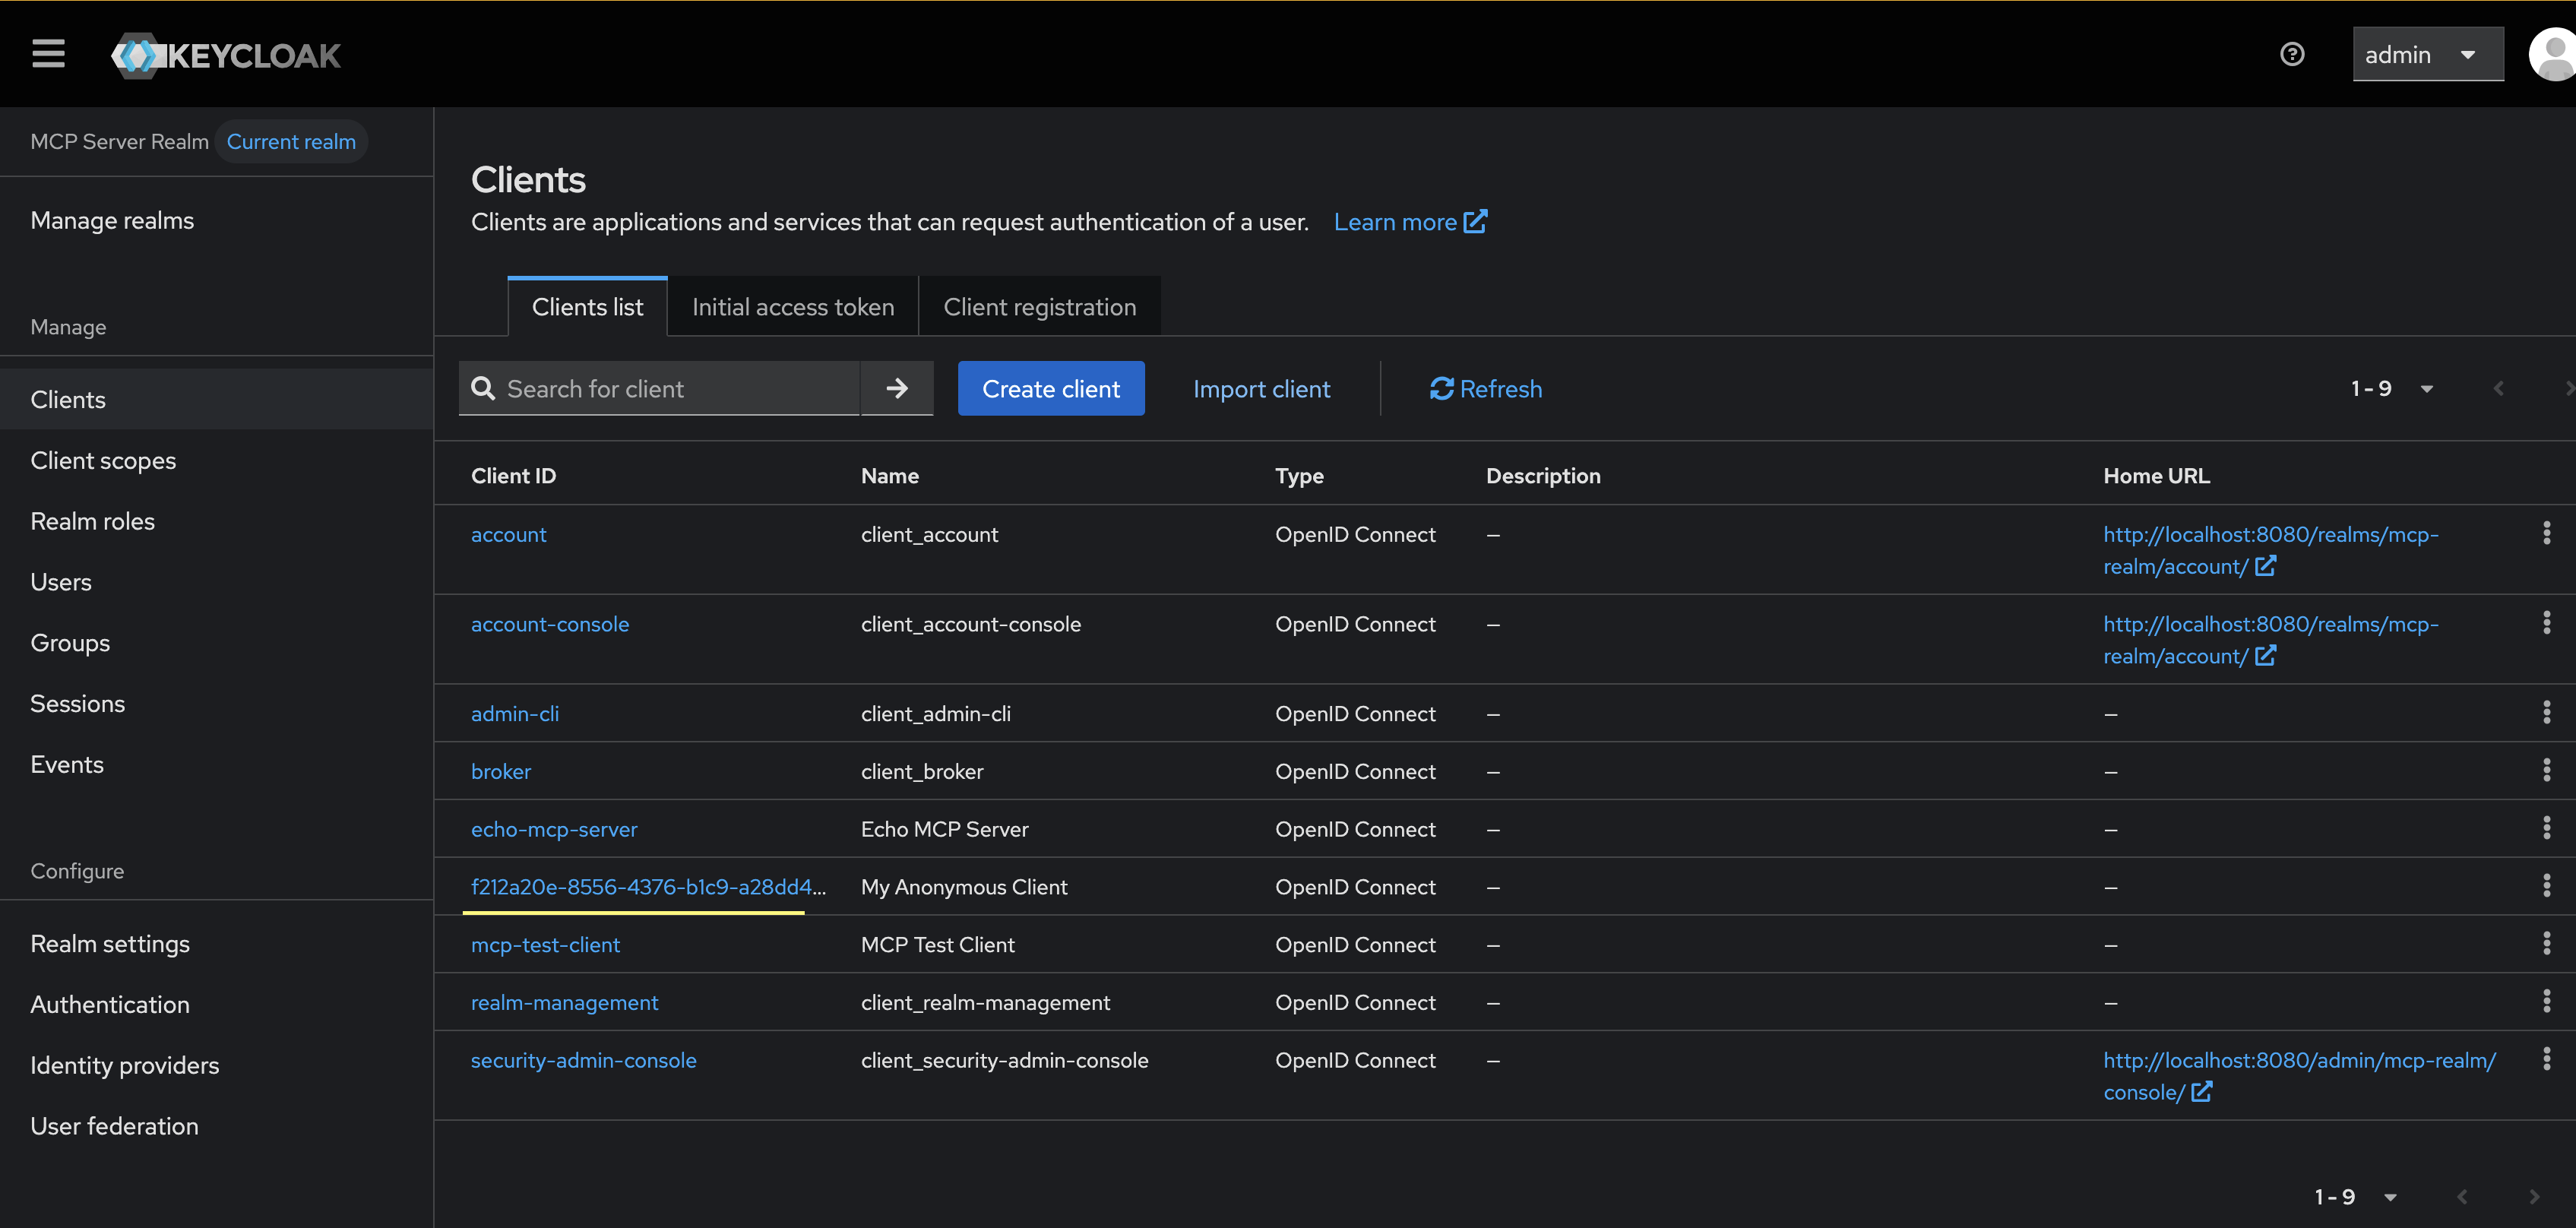
You can see the new OAuth client in the client list above. The MCP client should save the OAuth client_id (and any client credentials). Now that we have an OAuth client, we can proceed to call the authorization_endpoint which is http://localhost:8080/realms/mcp-realm/protocol/openid-connect/auth from our previously discovered URLs. For example, to get the consent from the user, we send the user to the following URL:
http://localhost:8080/realms/mcp-realm/protocol/openid-connect/auth?response_type=code&client_id=f212a20e-8556-4376-b1c9-a28dd4adb2ea&redirect_uri=http%3A%2F%2Flocalhost%3A9090%2Fcallback&scope=mcp%3Aread+mcp%3Atools+mcp%3Aprompts+echo-mcp-server-audience&state=FTqz4qpaoowKk-LeH-HTNA&resource=http%3A%2F%2Flocalhost%3A9000
NOTE: We use the resource parameter here, but Keycloak does not respect RFC 8707. We add it here since that is suggested by the MCP Authorization spec.
This takes us to the Keycloak authentication page. We can sign in with one of our previously registered users:
username=mcp-user
password=user123
If authentication is successful, Keycloak will show you the consent page which displays the scopes requested by the client and asks you to grant these authorizations (ie, delegate these authorizations on your behalf).

This will redirect back to our MCP client with an authorization code. The client can now use this code to request an access token. The client should use PKCE to prevent stolen authorization codes from giving attackers access to get access tokens.
http://localhost:9090/callback?state=FTqz4qpaoowKk-LeH-HTNA&session_state=1d6a90eb-0409-4452-b976-431abd602f09&iss=http%3A%2F%2Flocalhost%3A8080%2Frealms%2Fmcp-realm&code=e7560da7-d904-4ef0-ab02-c1d6aac7eec3.1d6a90eb-0409-4452-b976-431abd602f09.f212a20e-8556-4376-b1c9-a28dd4adb2ea
At this point, we should now be authenticated, and our OAuth client can see the MCP tools list:
{
  "jsonrpc": "2.0",
  "id": 1,
  "result": {
    "tools": [
      {
        "name": "echo",
        "title": "Echo Tool",
        "description": "Echo a message",
        "inputSchema": {
          "properties": {
            "message": {
              "description": "Message to echo",
              "title": "Message",
              "type": "string"
            },
            "repeat_count": {
              "default": 1,
              "maximum": 10,
              "minimum": 1,
              "title": "Repeat Count",
              "type": "integer"
            }
          },
          "required": [
            "message"
          ],
          "title": "EchoRequest",
          "type": "object"
        },
        "outputSchema": {
          "type": "object",
          "properties": {
            "text": {
              "type": "string",
              "description": "The echoed message"
            }
          }
        },
        "annotations": {
          "title": "Echo Tool",
          "readOnlyHint": false,
          "destructiveHint": false,
          "idempotentHint": true,
          "openWorldHint": false
        },
        "meta": null
      }
    ]
  }
}
Using MCP Inspector
We have created an OAuth our own custom MCP client to illustrate what an MCP client should do and how it can dynamically connect up to an MCP server it may not have known about in advance. This achieves the plug and play goal of MCP. We will also show how to do this in the mcp-inspector tool for testing MCP servers.
NOTE: At the time of writing, there are some bugs in the inspector tool. It passes the scopes (all of the scopes) from the authorization server metadata when it registers an MCP client. It should not do this (least privilege, etc). For now I am using my patched version here.
NOTE: At the time of this writing, Keycloak does not handle CORS well on the AS metadata. We will use a reverse proxy (ie, Agent Gateway) to solve that.
Going to the MCP inspector page, let’s enter the right transport (HTTP Streamable), URL http://localhost:9000/mcp and then let’s click on the Open Auth Settings so we can watch step by step how the MCP client handles auth.
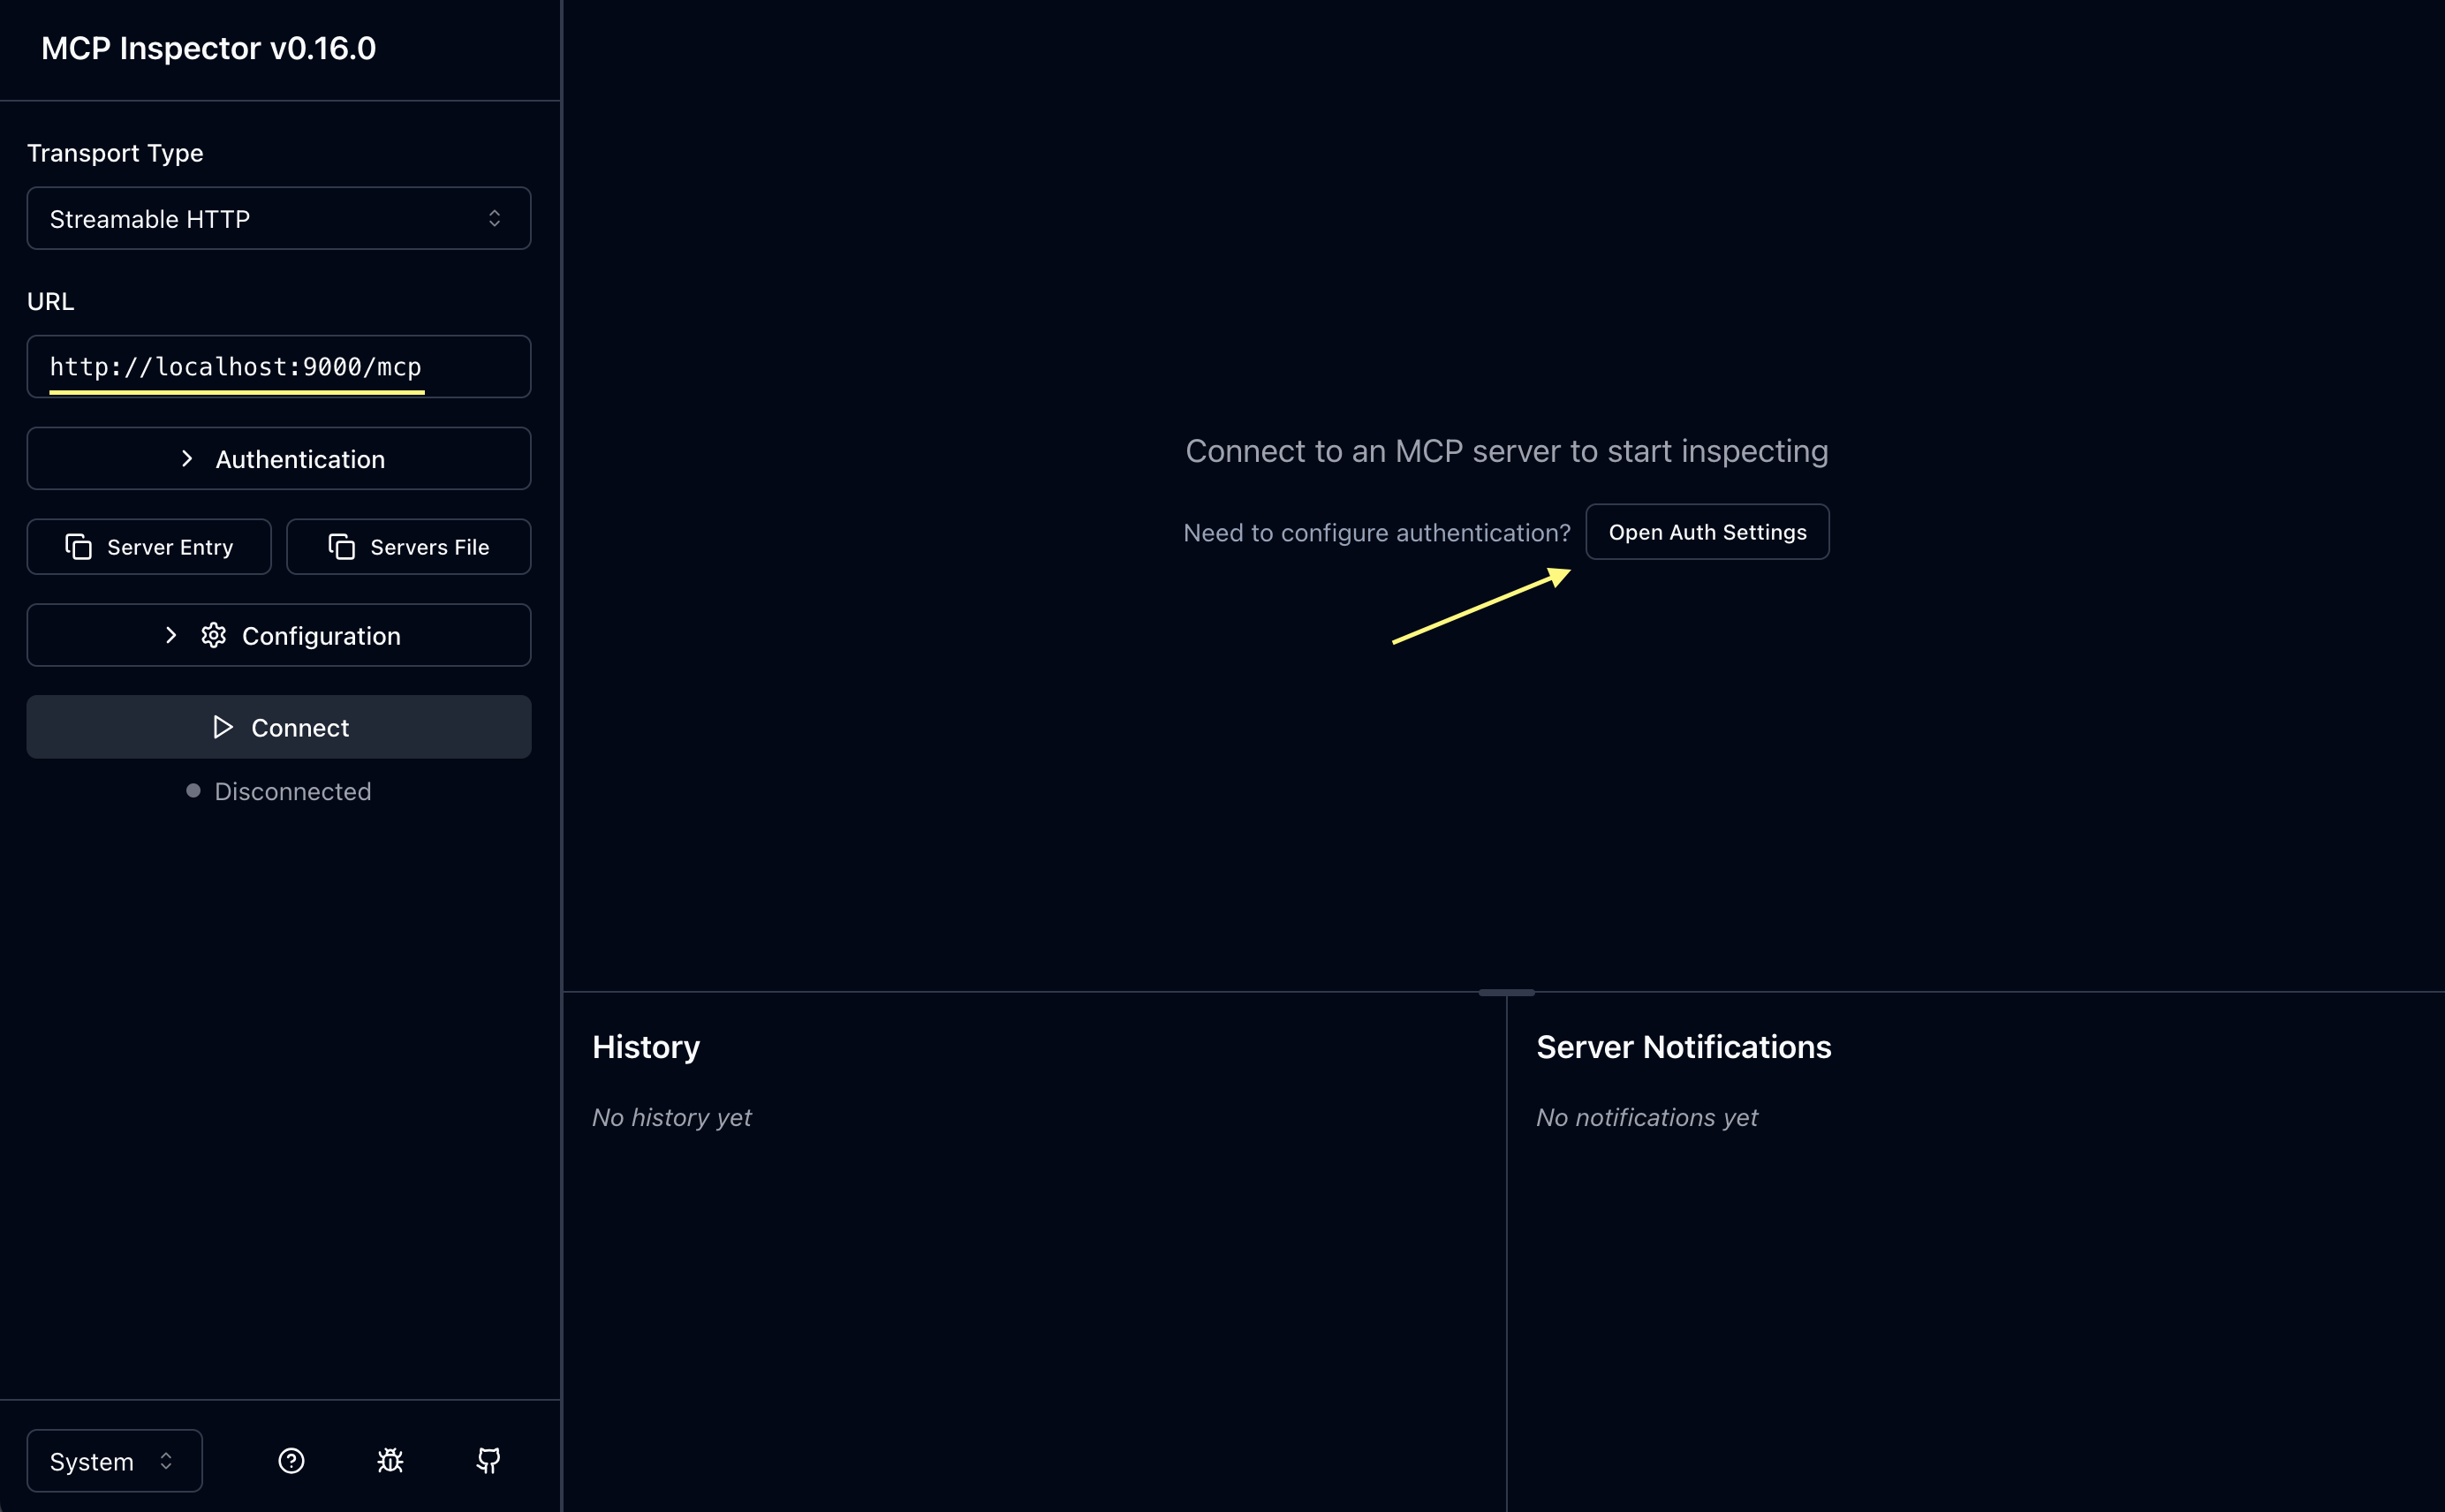
Once we click we should see something similar to this:

Now scroll down to see all of the steps we can walk through:
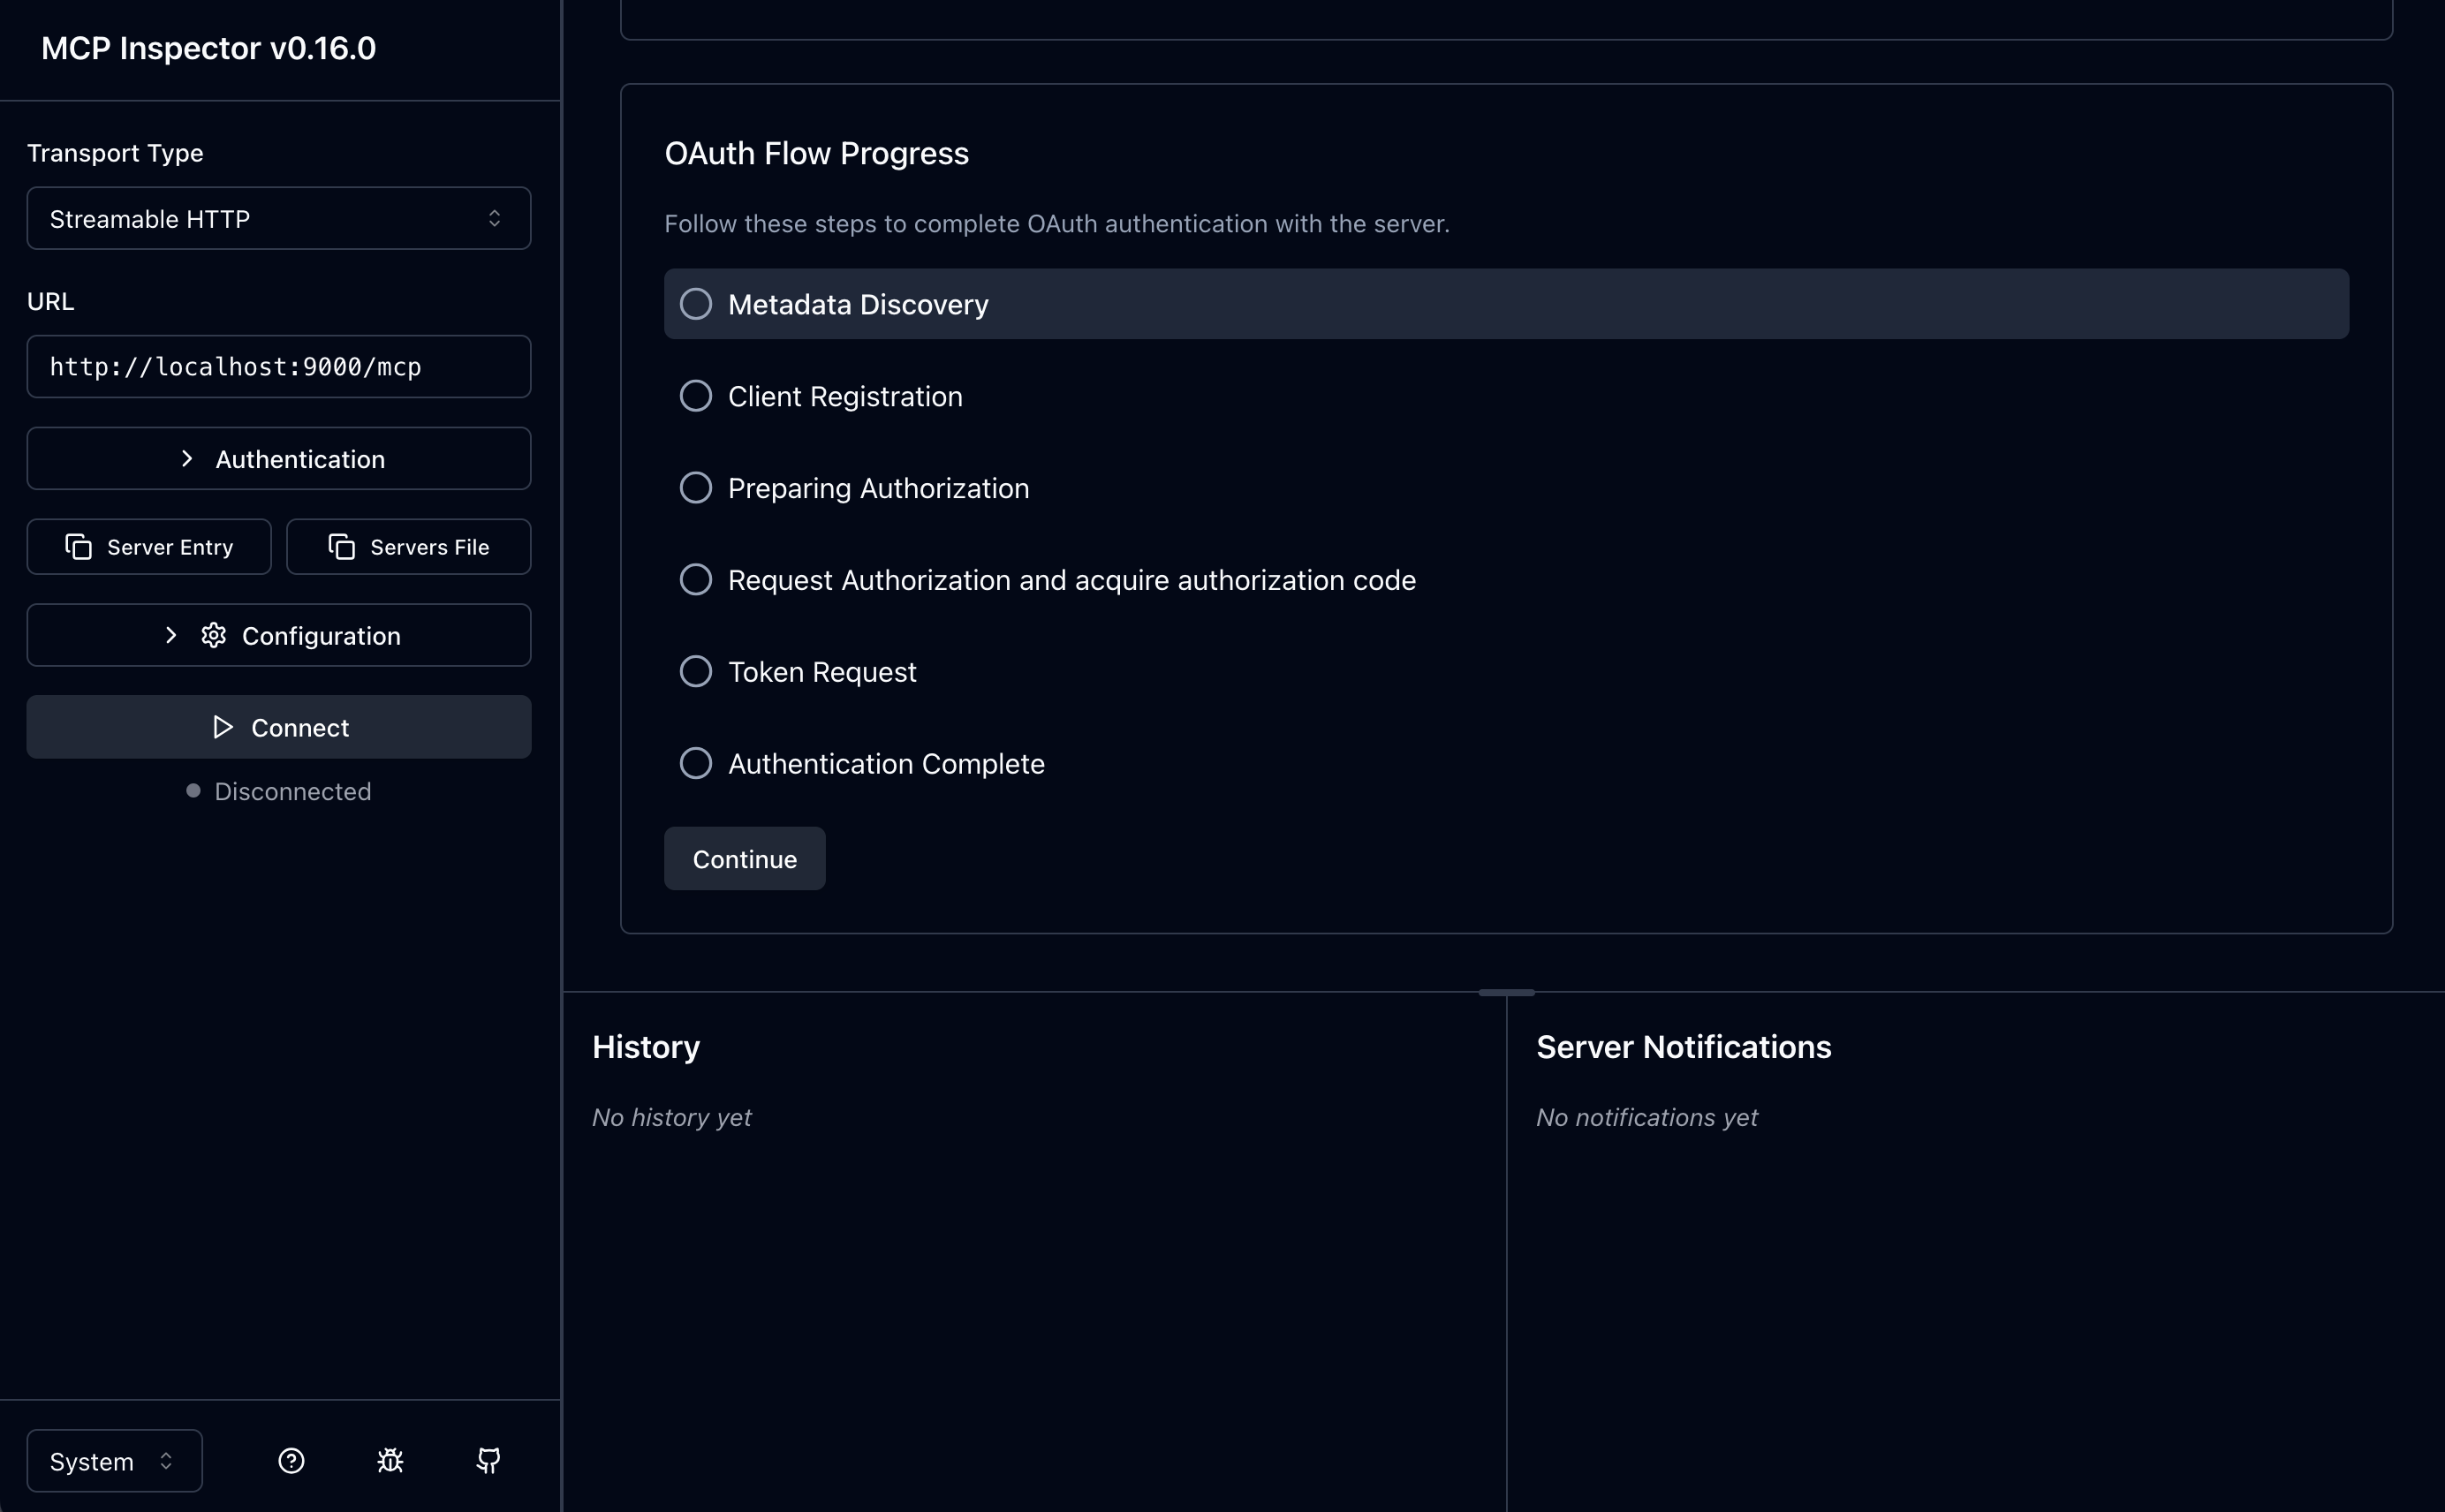
You can click on the Continue to step through the process of retrieving the metadata, registering the client, and then getting an auth code and token:
1. Discover the Metadata
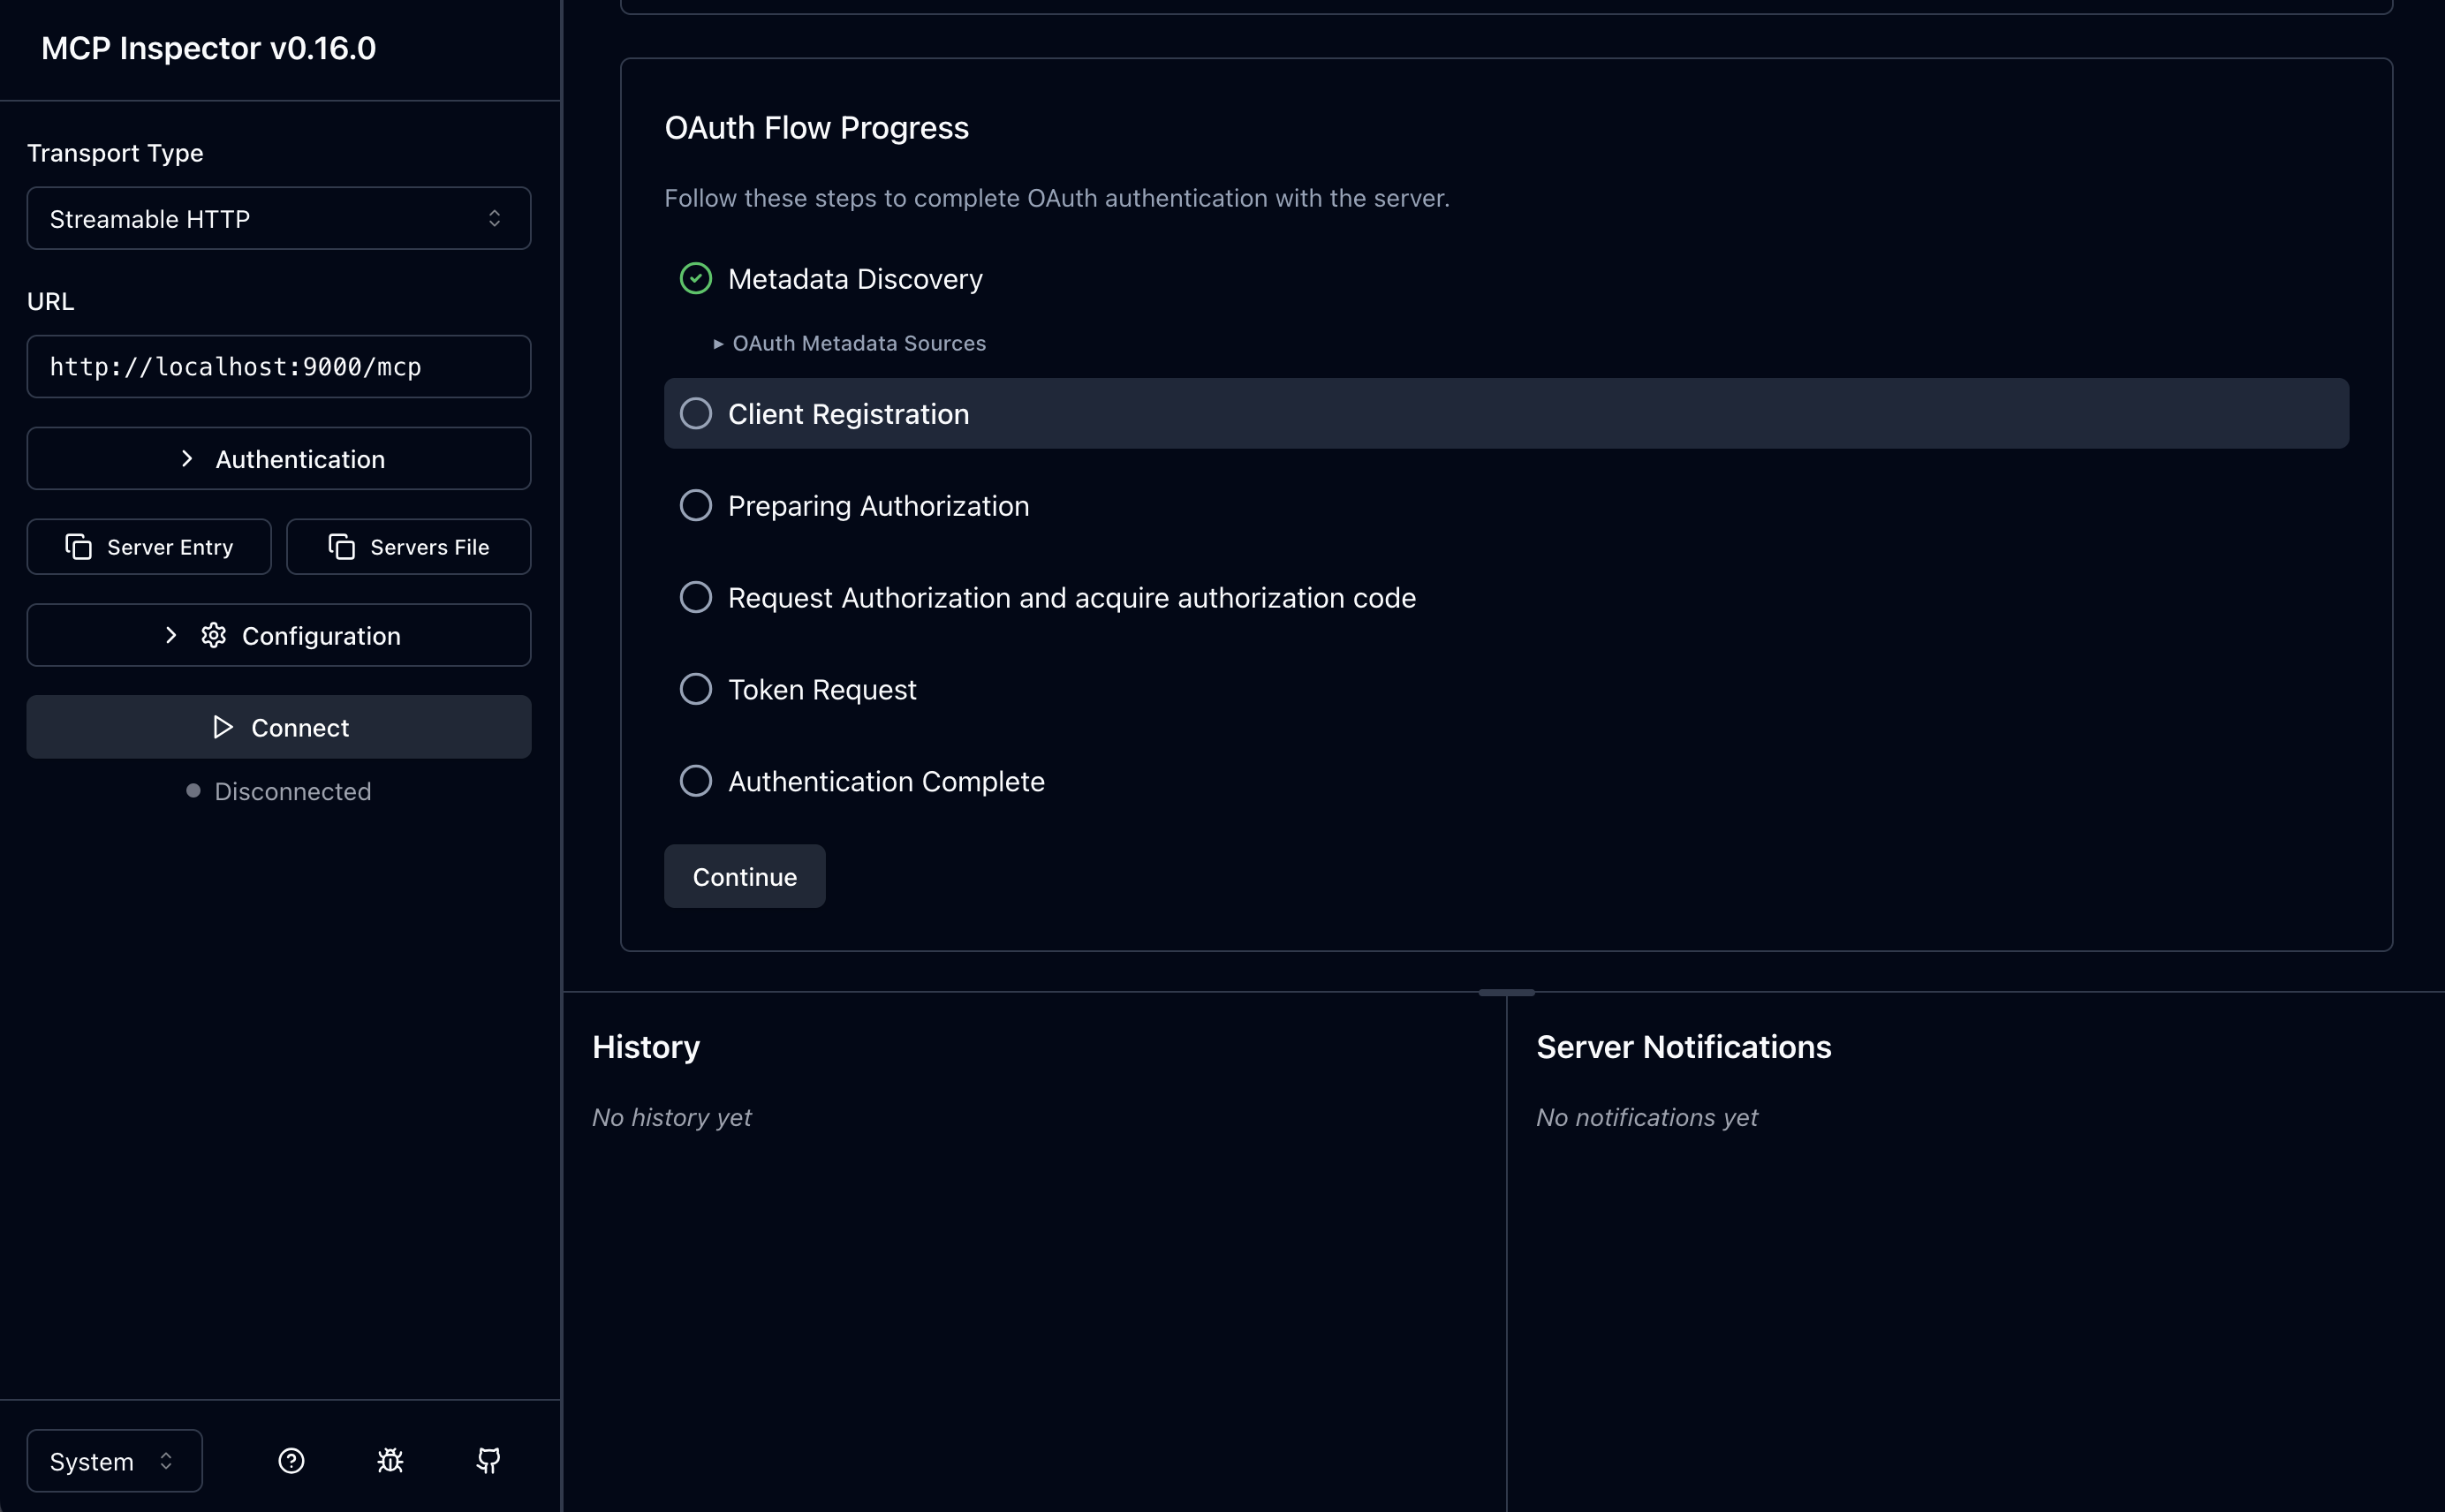
2. Client Registration
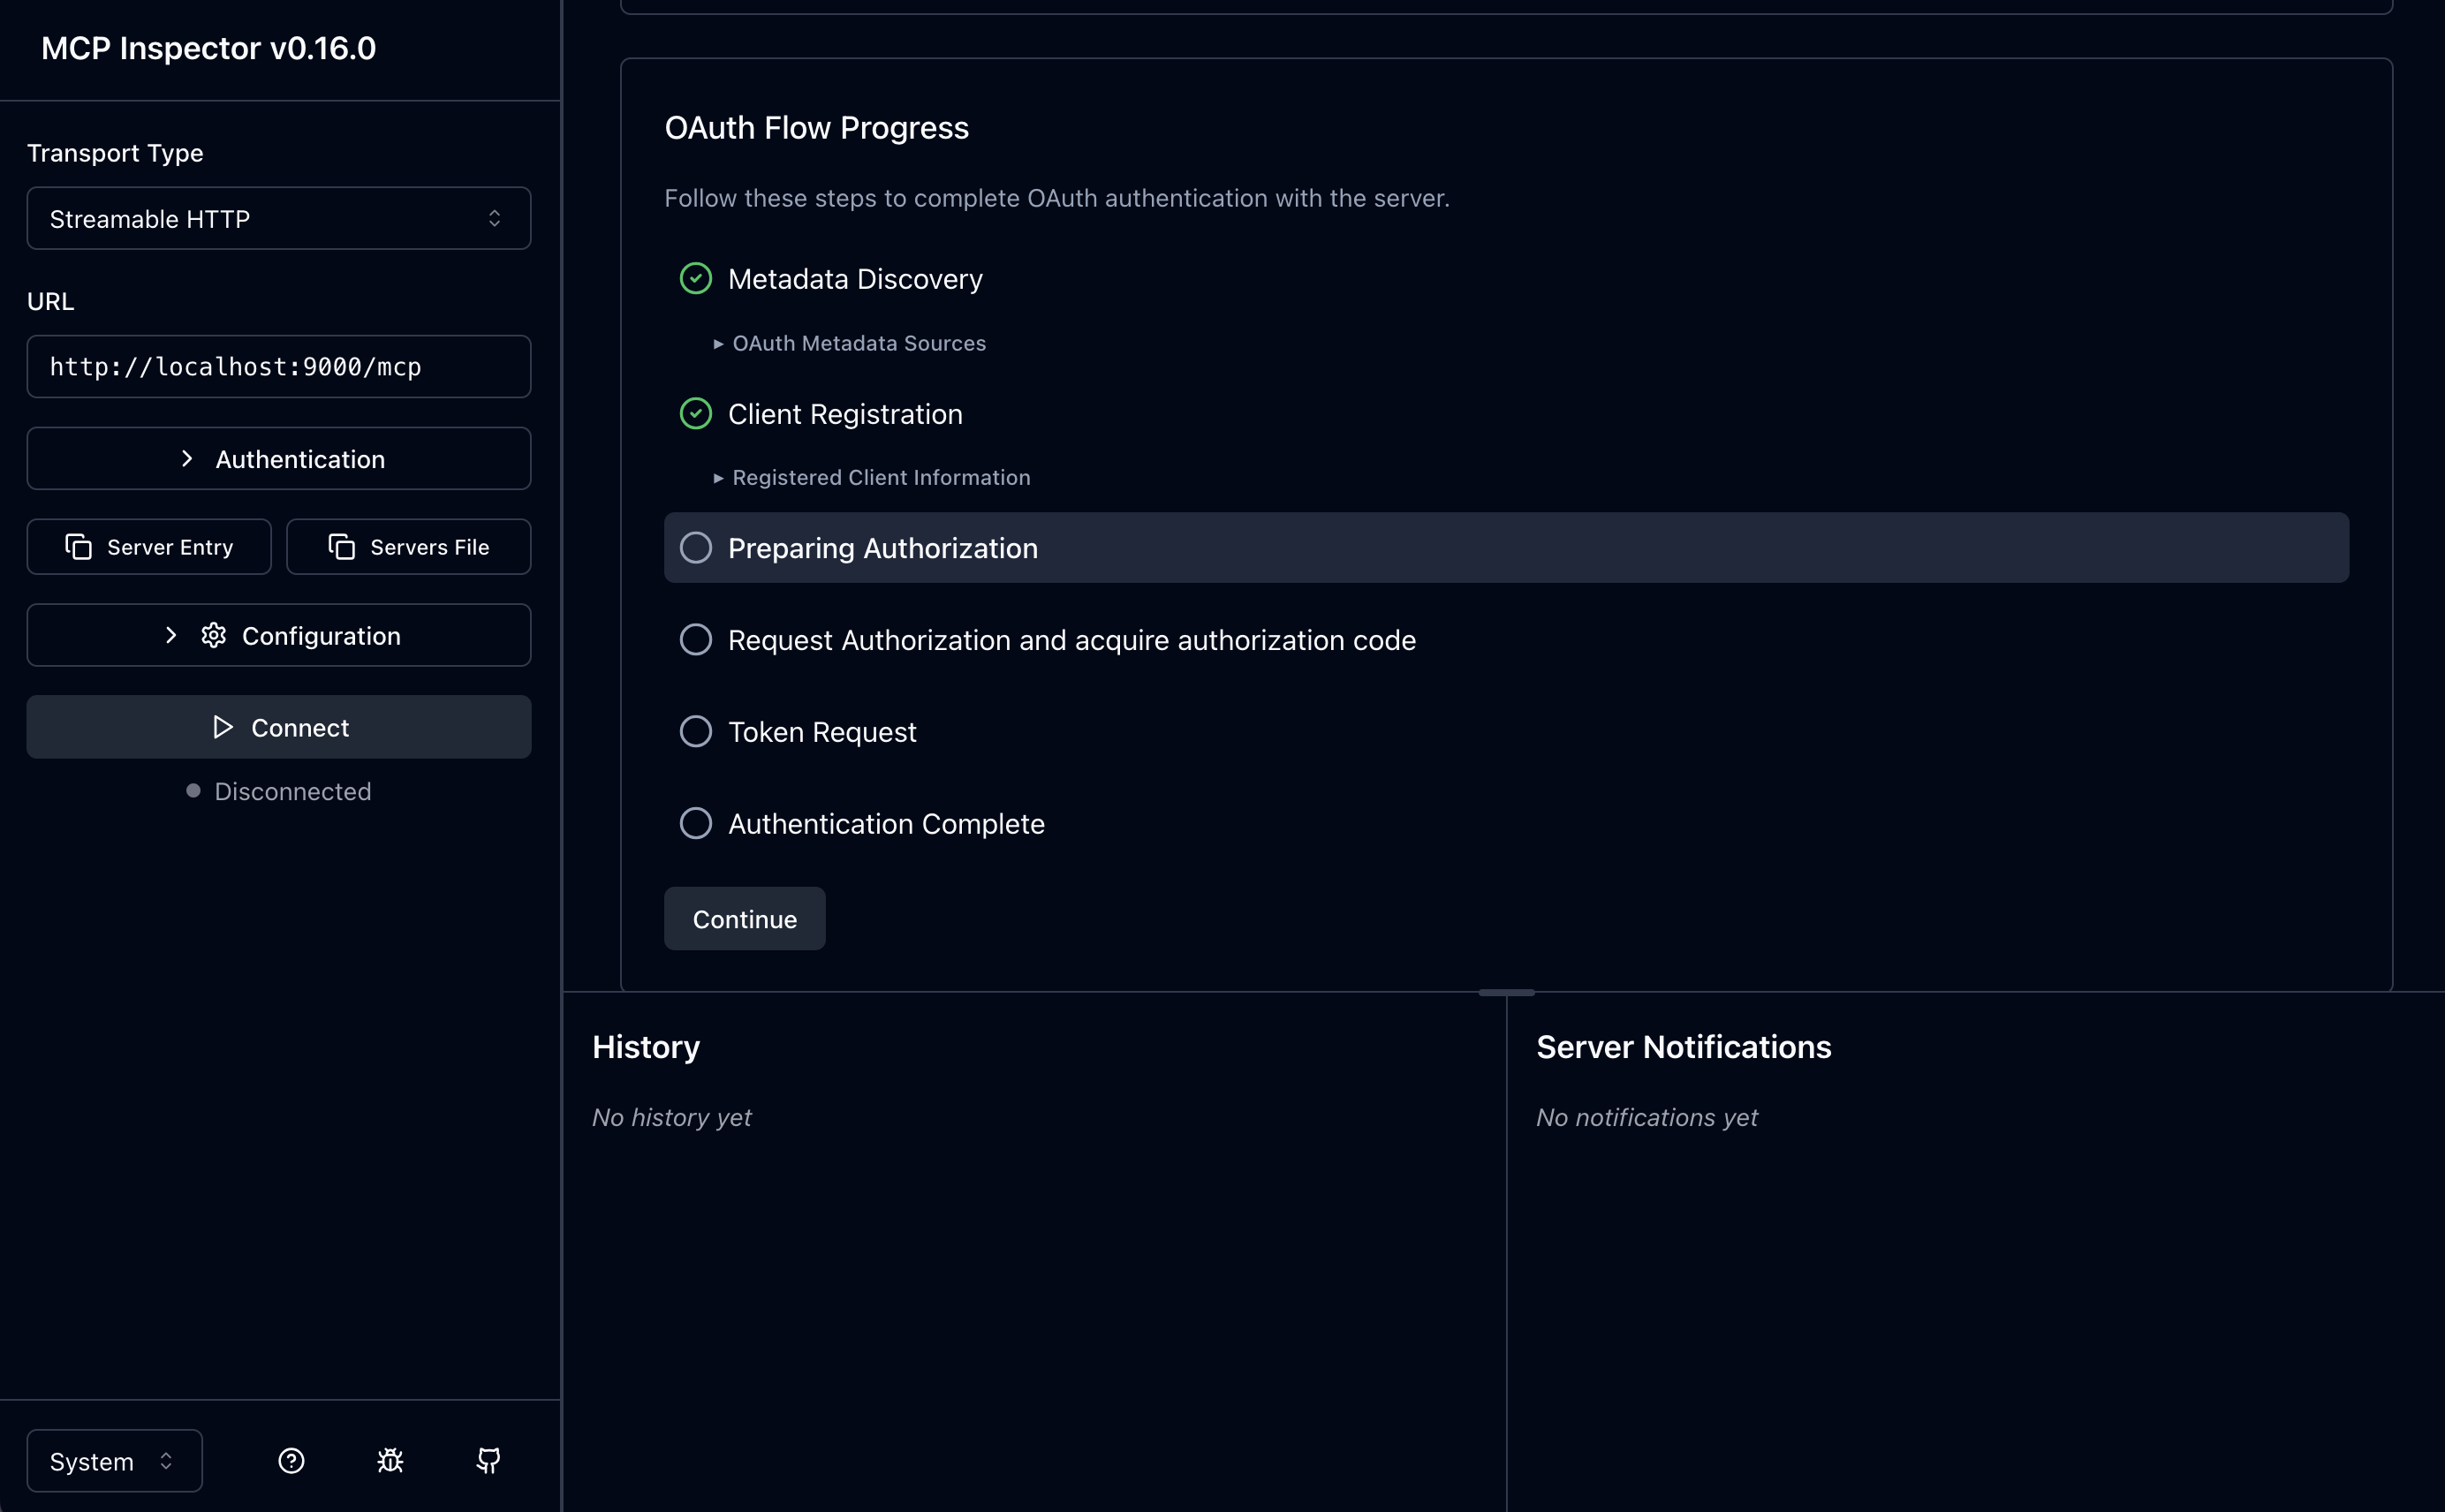
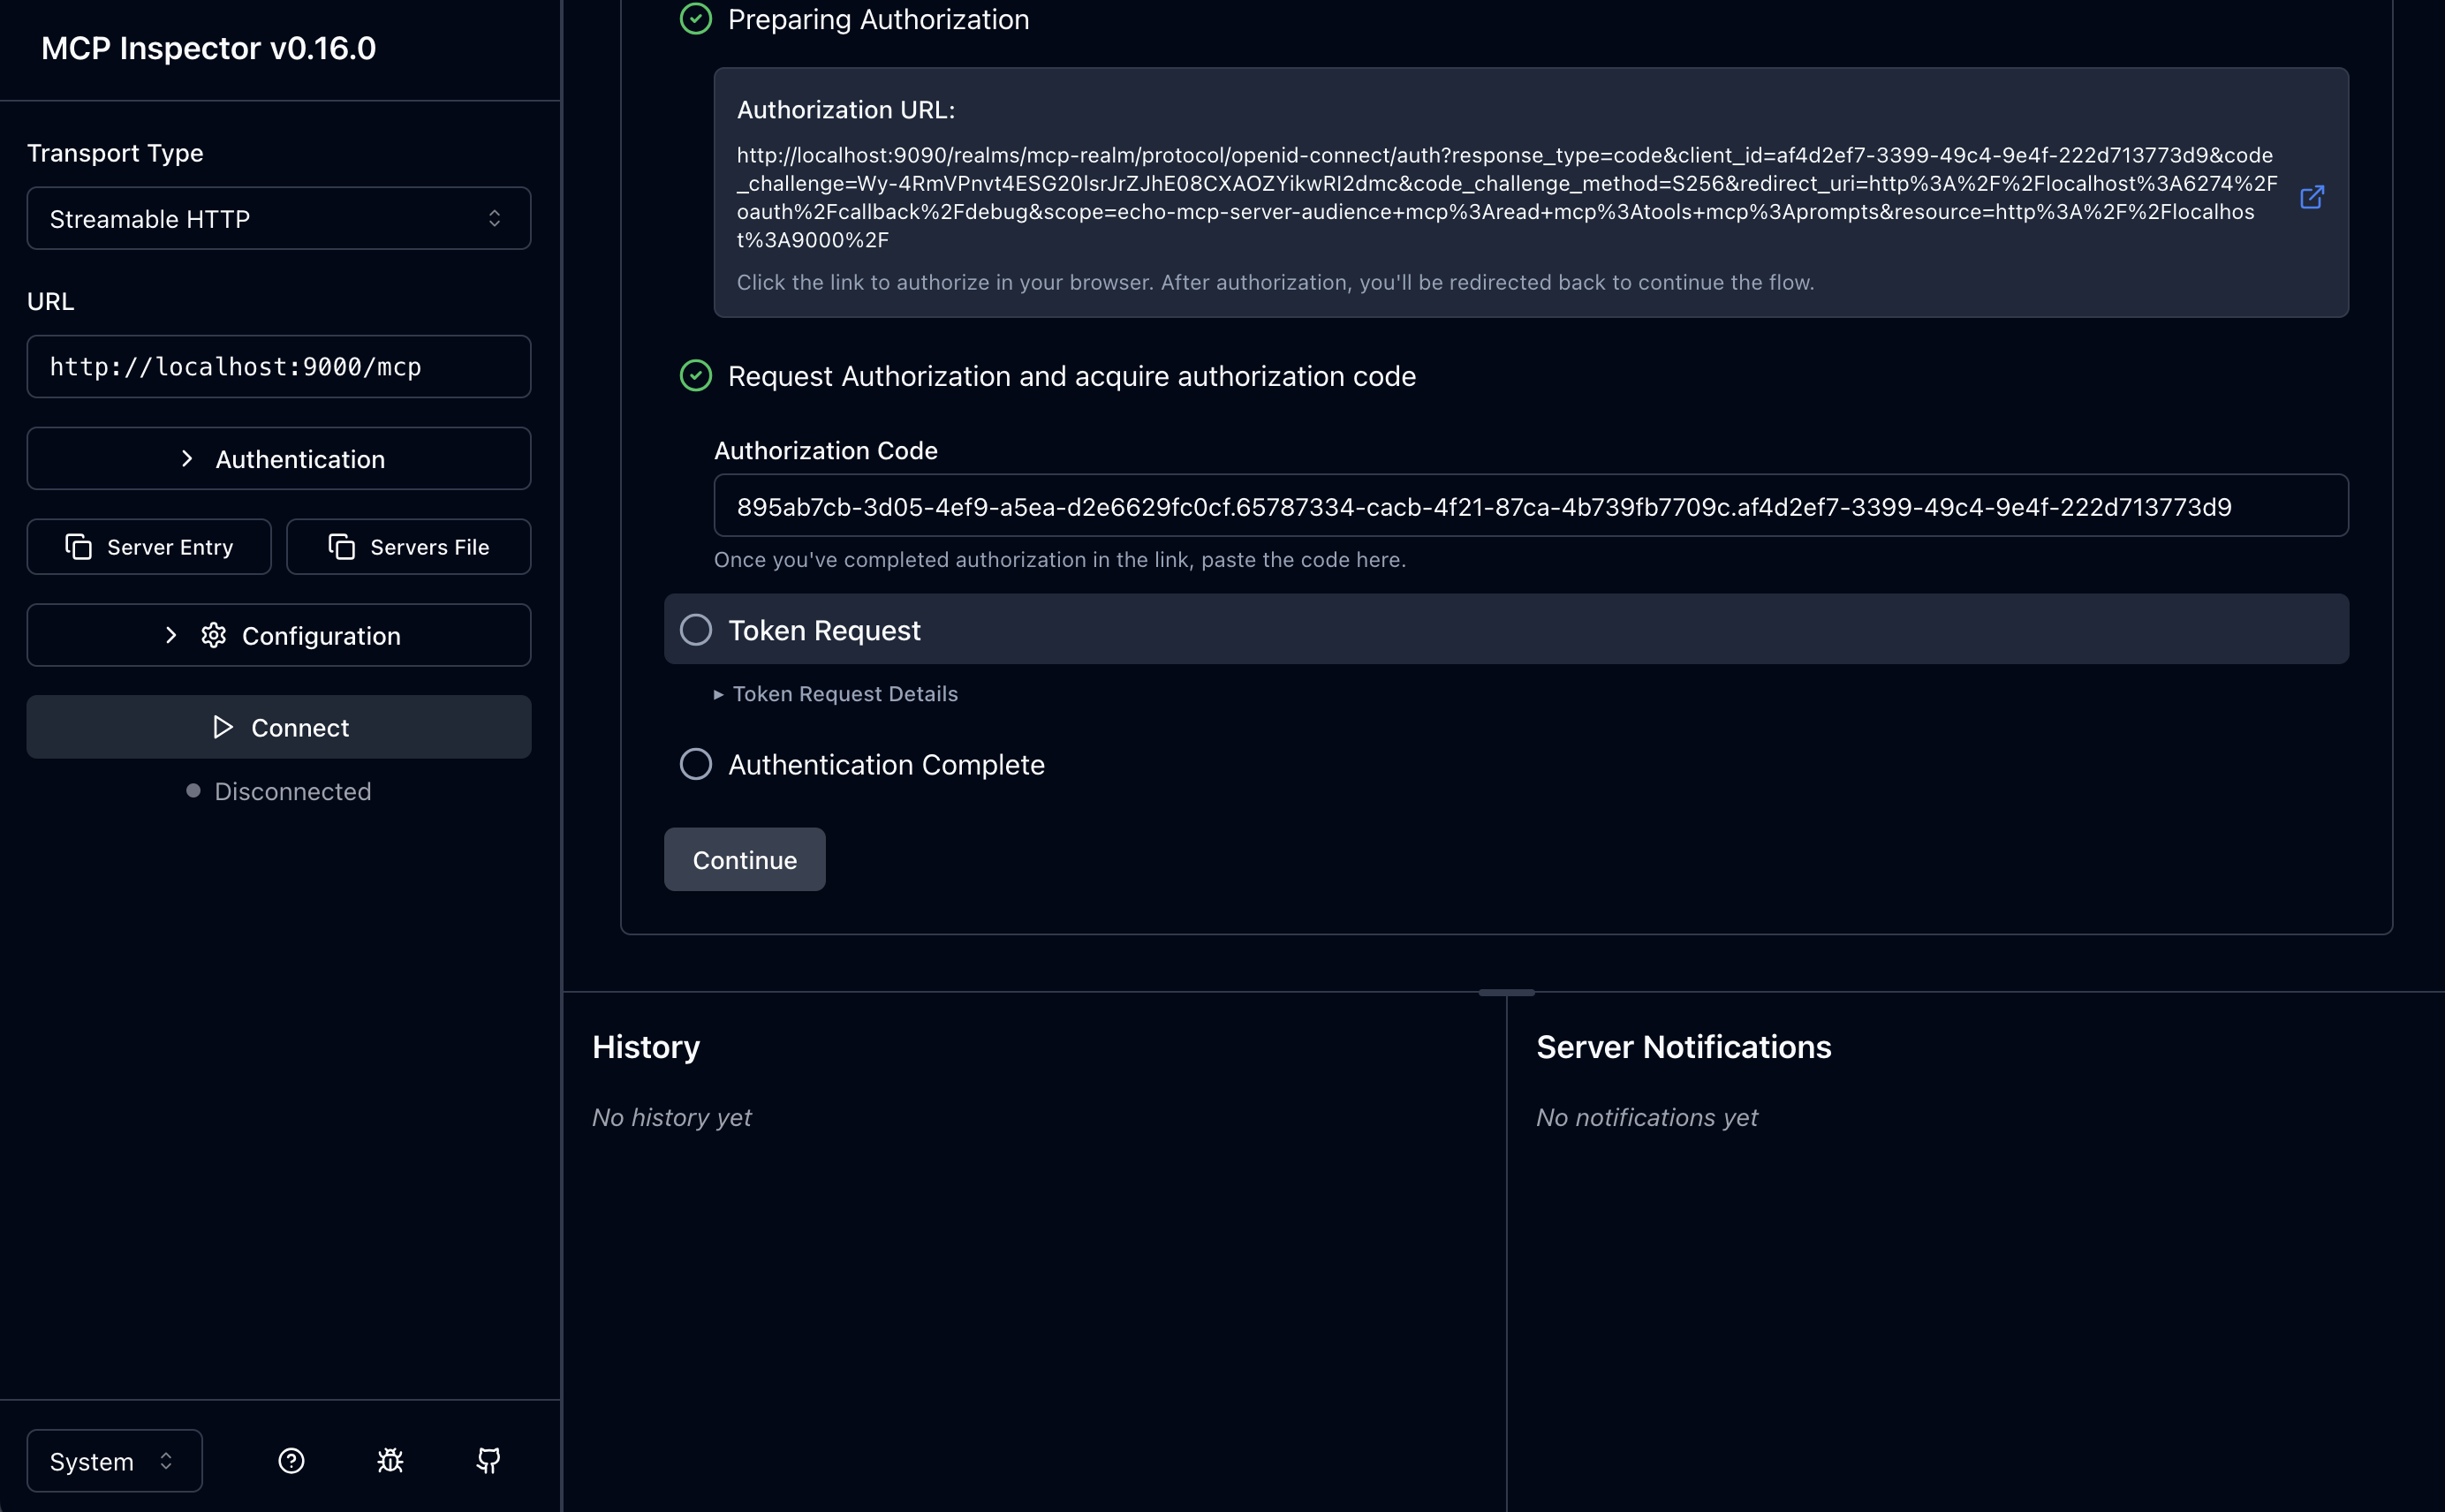
3. Prepare Authorization

You can click the little arrow (or copy/paste the URL) to start the auth-code flow.
4. Request Authorization Code
If you login and consent, you should see the auth-code:
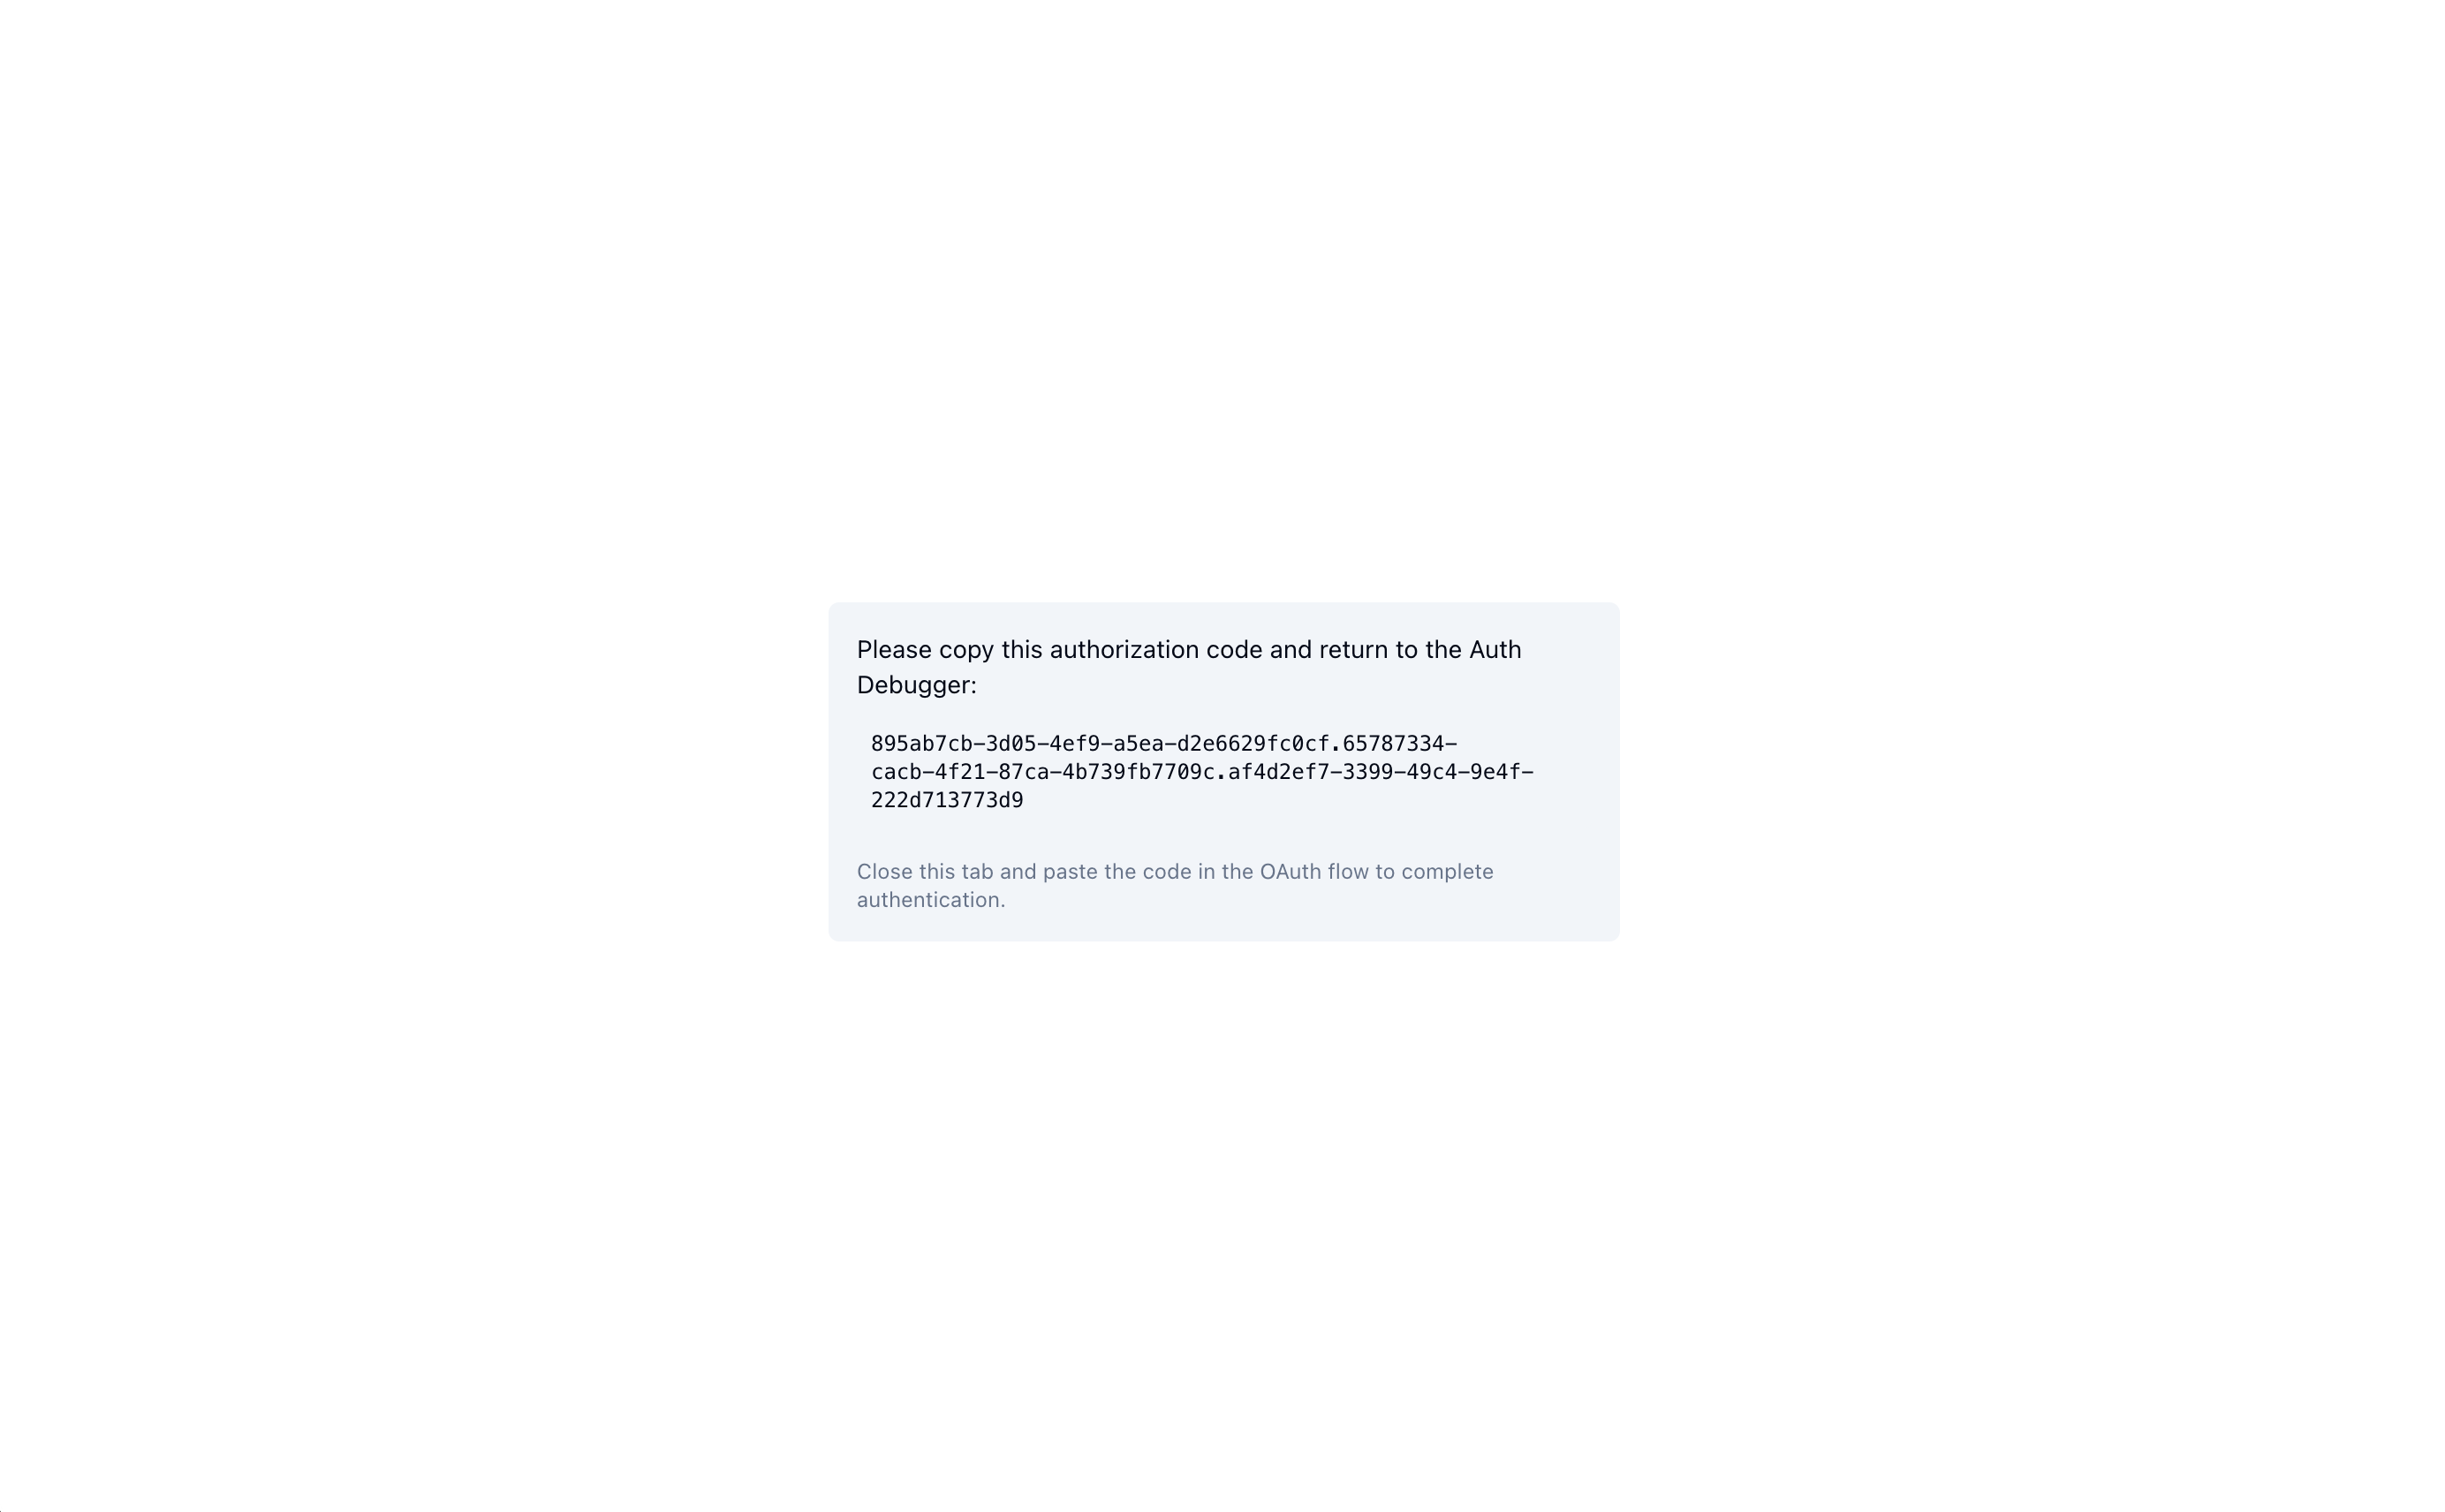
And you can copy-paste that code into the mcp-inspector:
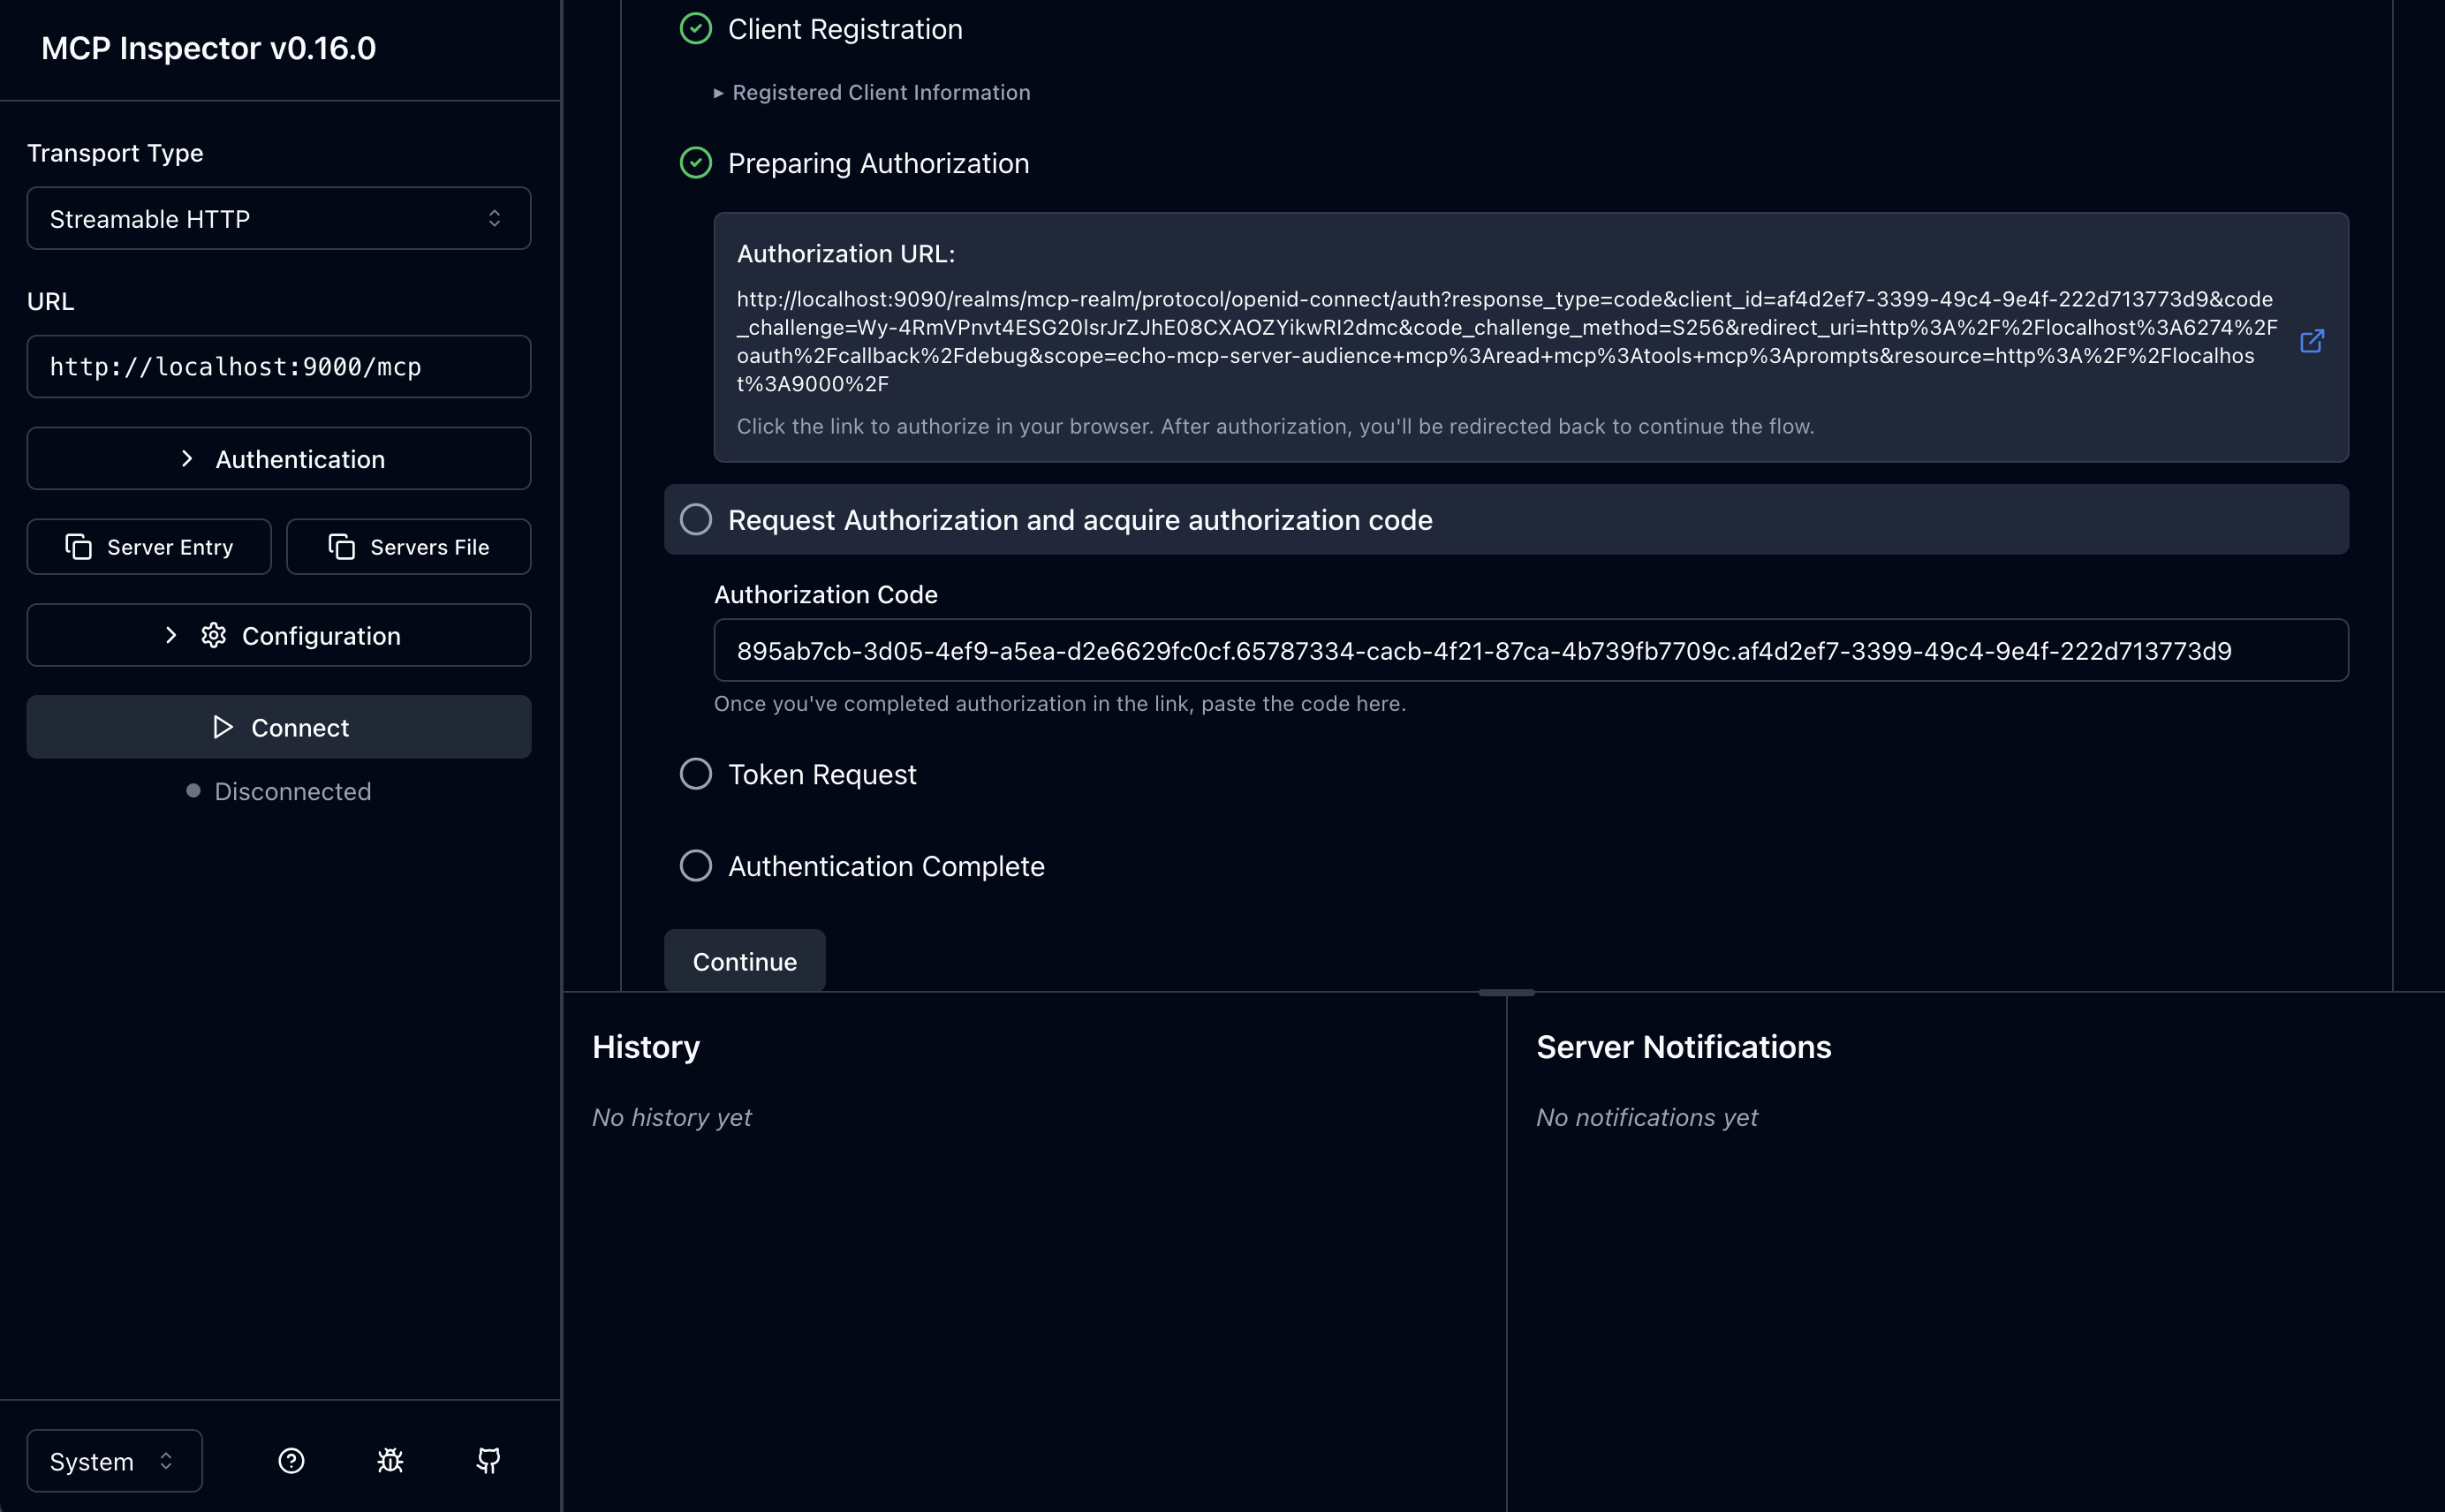
And now you can click continue to finish that step:
5. Token Request / 6. Auth Complete
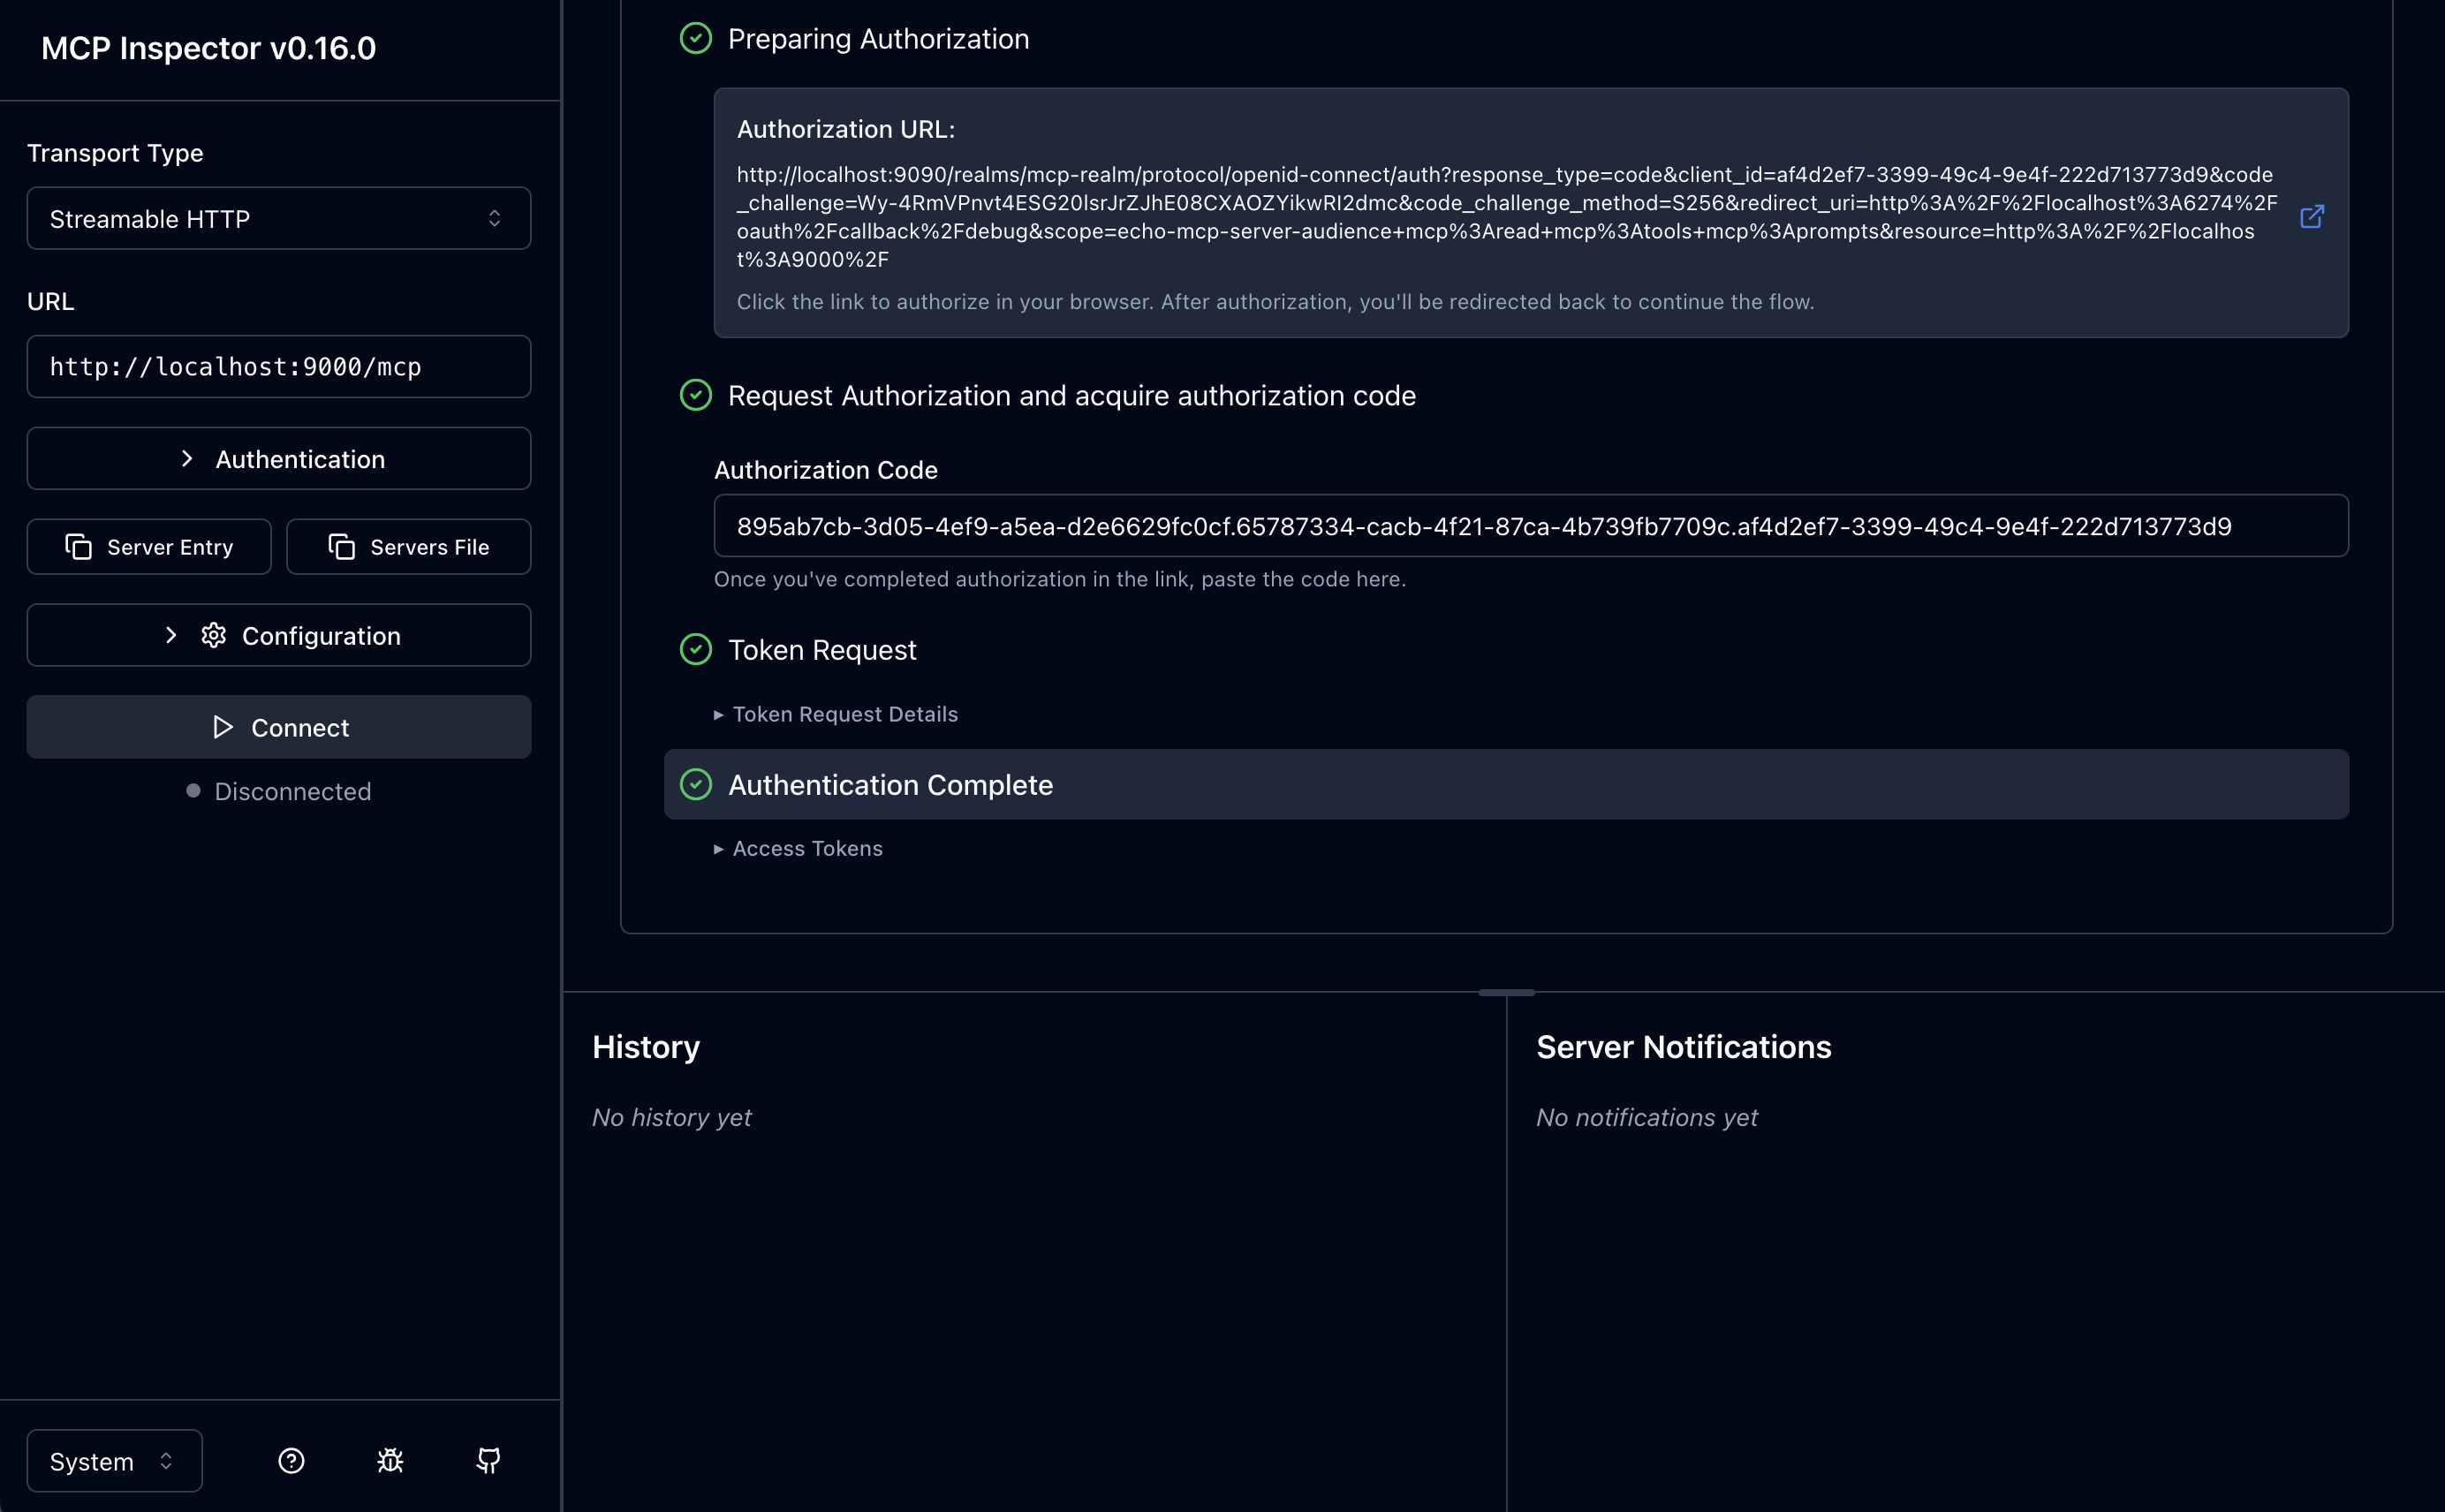
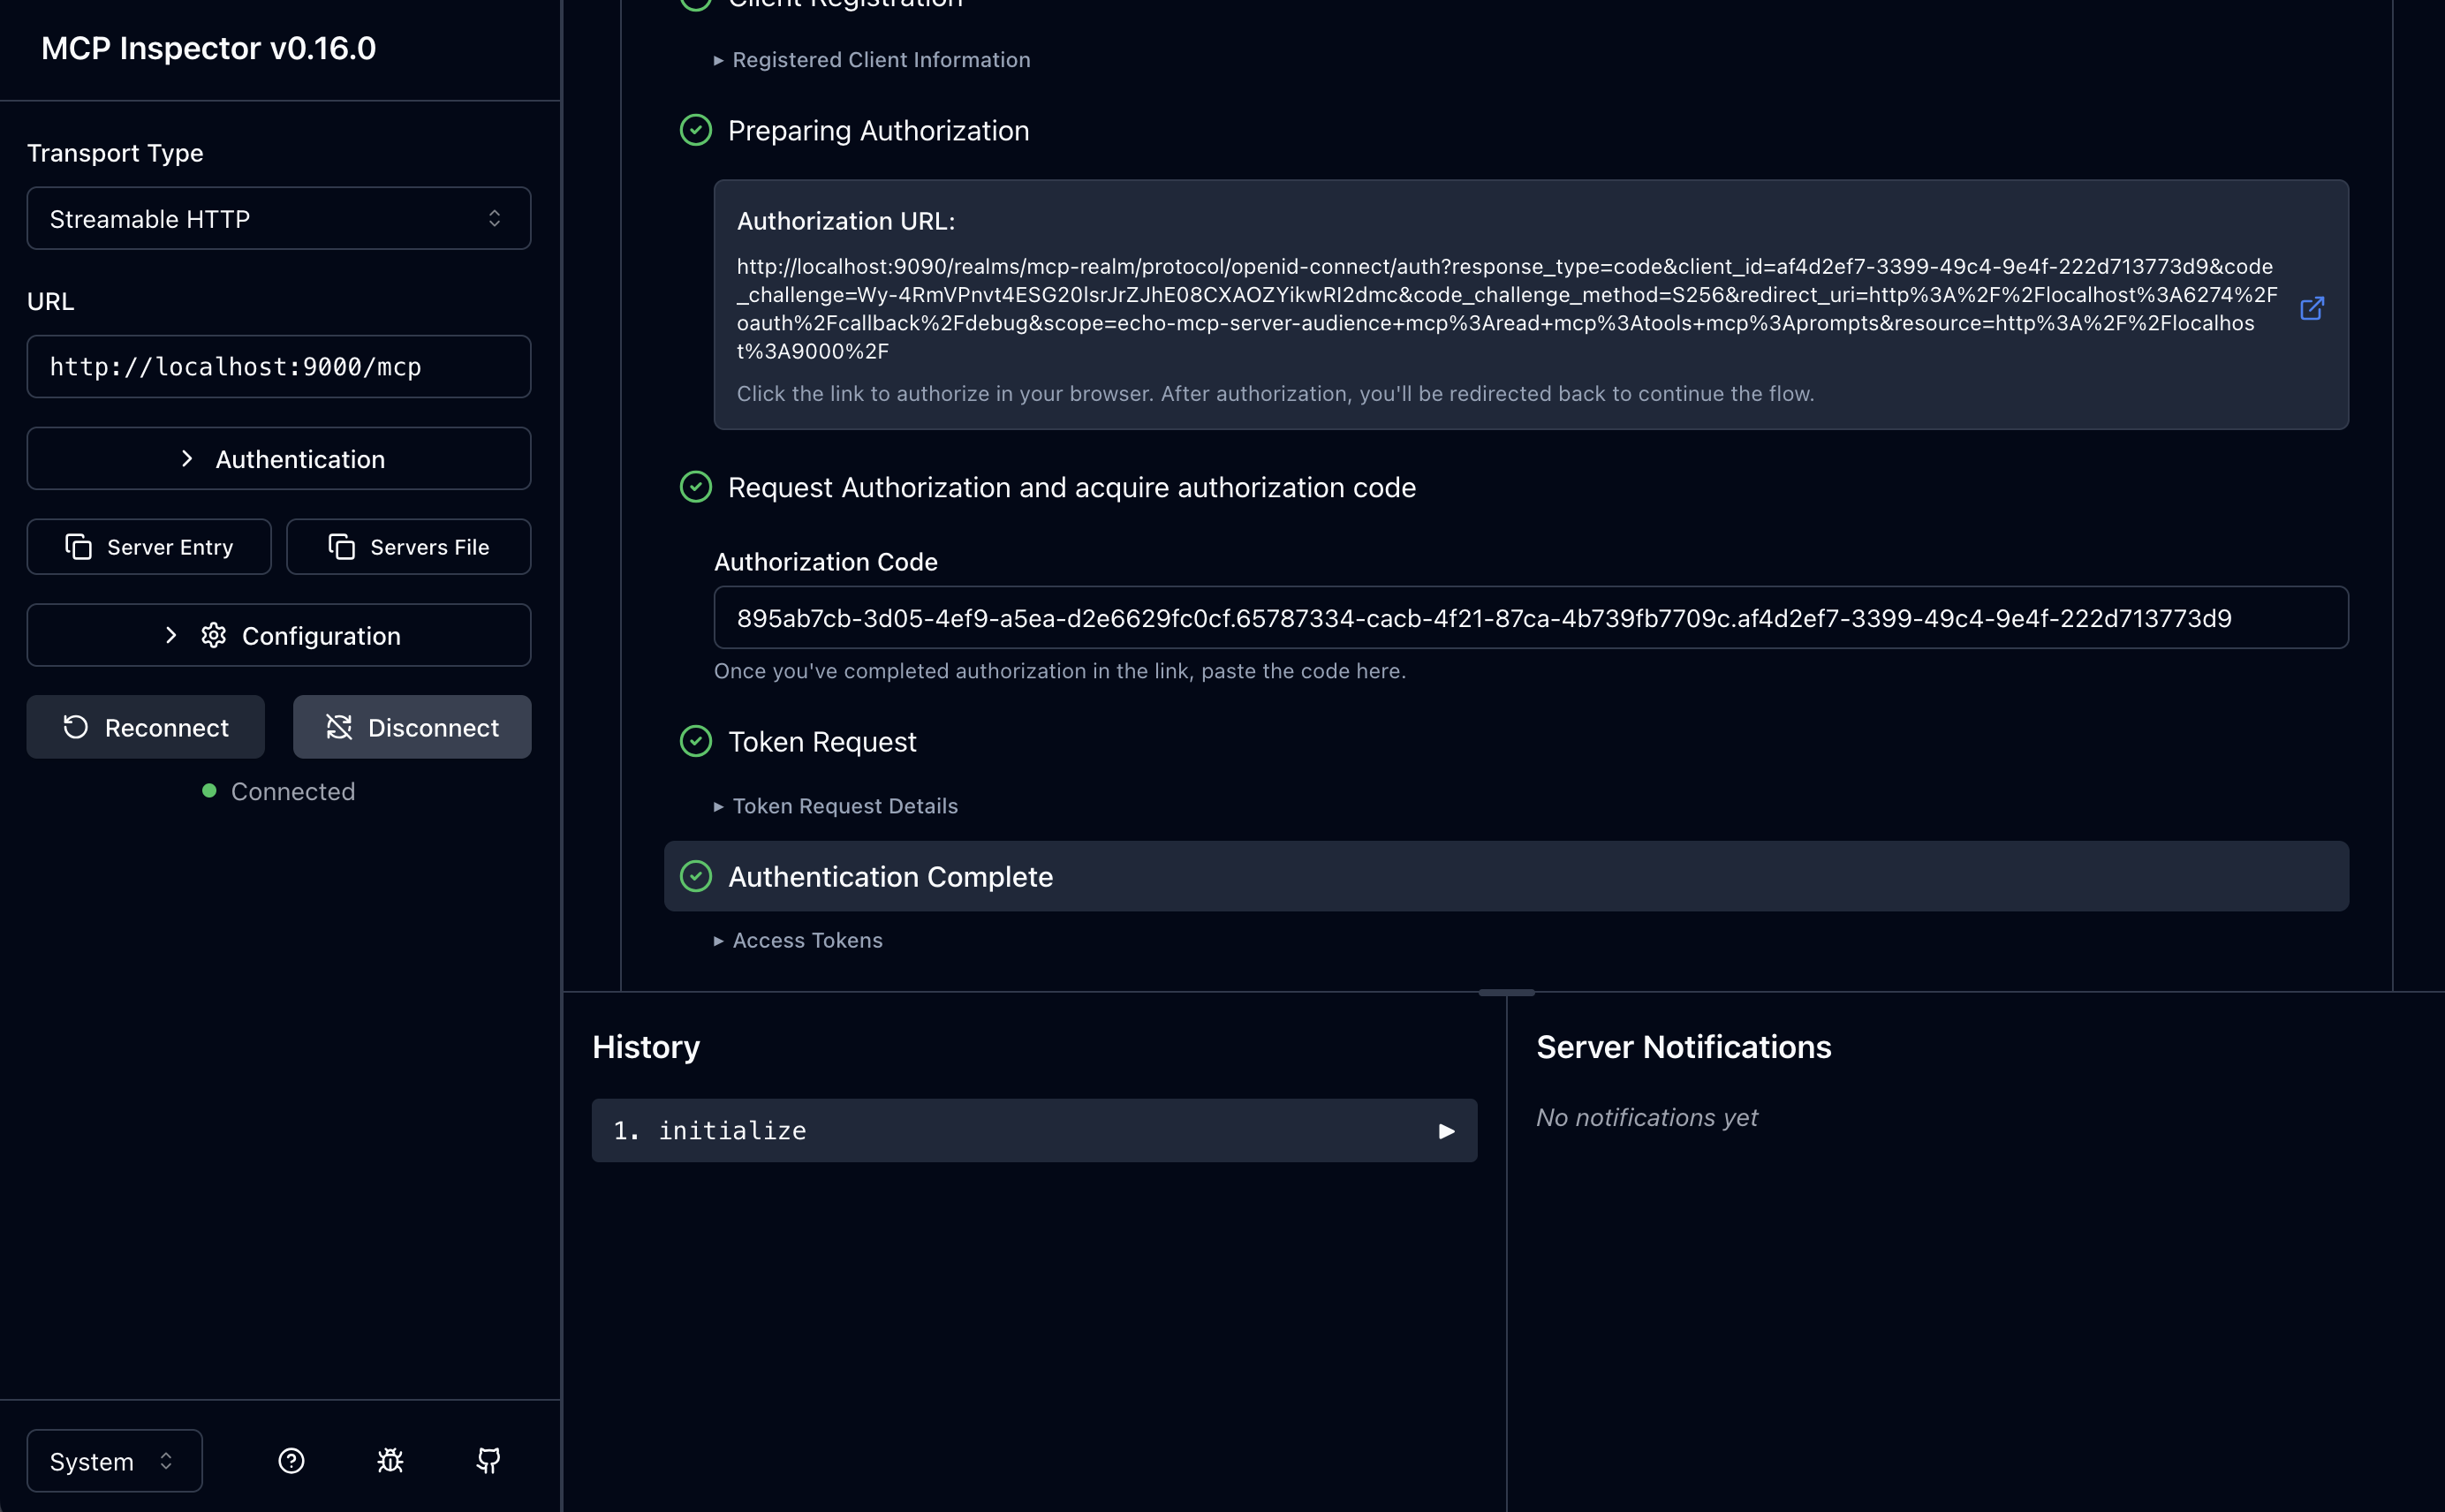
Auth Complete
Now that we have an OAuth access token, we can click “Connect” on the left-hand panel, which will send the access token along with the Initialize MCP message. You should see that mcp-inspector connects successfully.
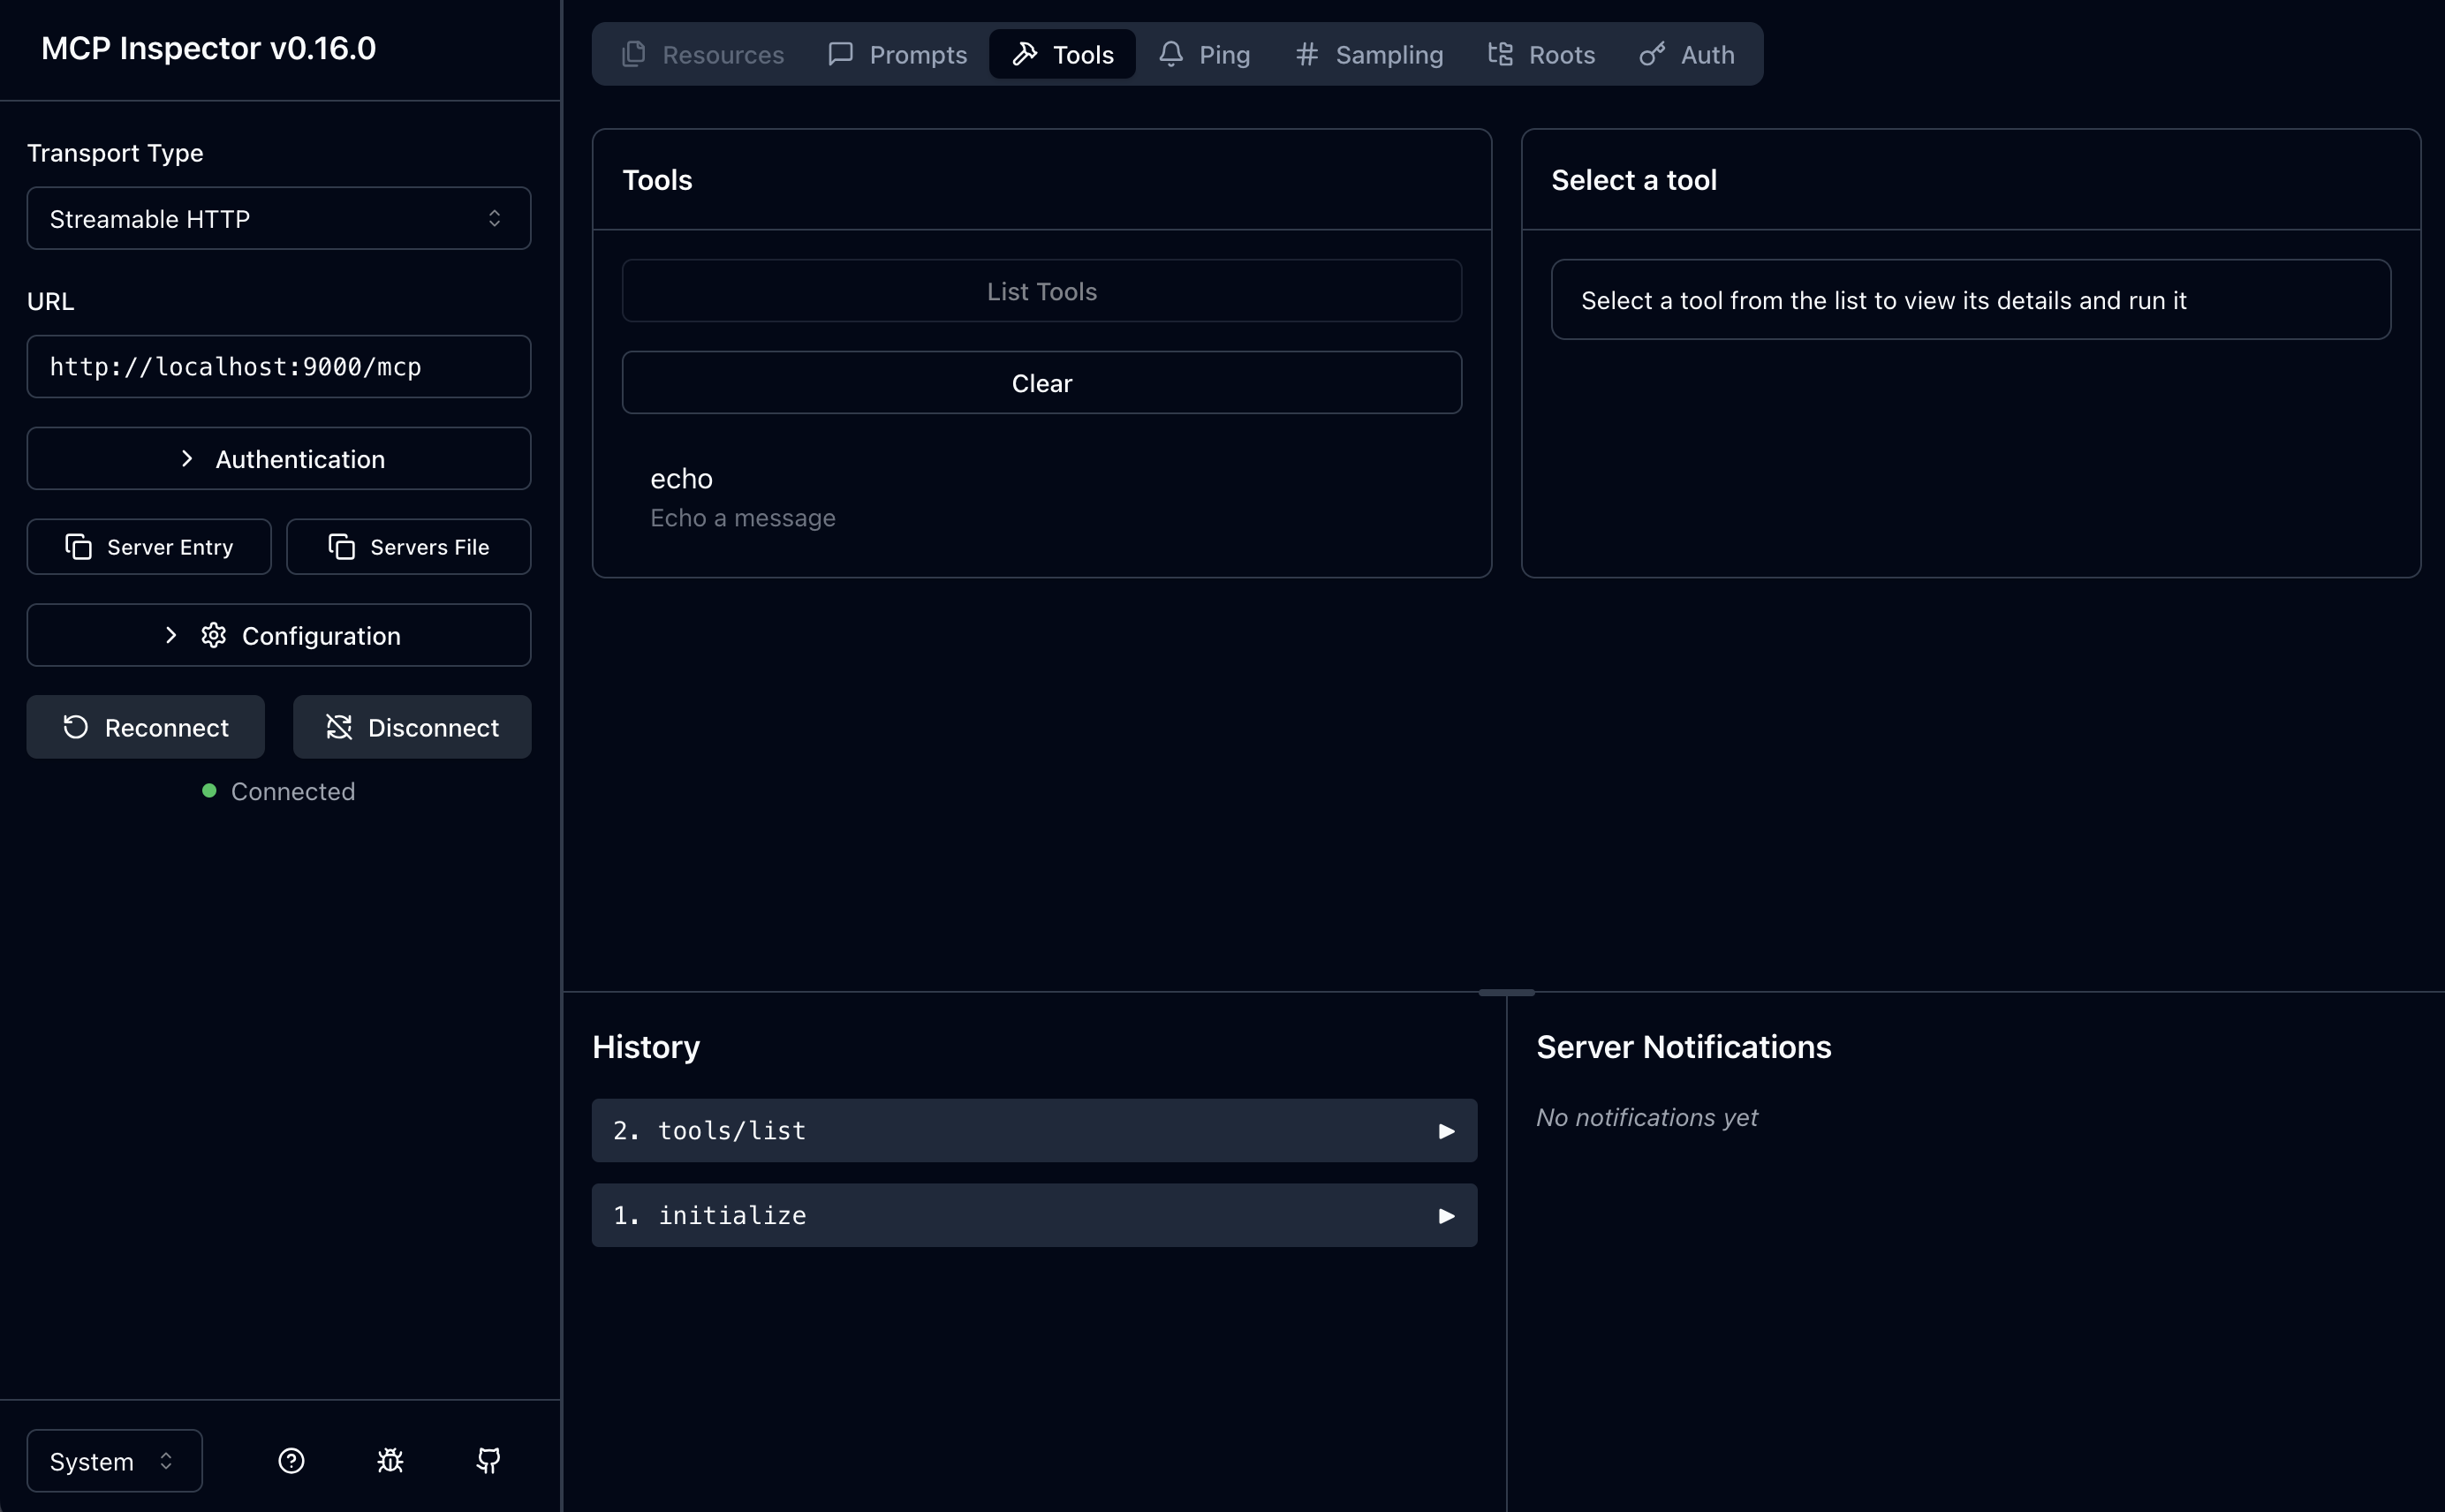
From here, you can list tools, and you can see the only tool we expose on our MCP server, the echo tool:
Wrapping up
At this point, we have successfully demonstrating the Dynamic Client Registration part of thee MCP Auth specification. Now, for the astute reader, you’ll notice some areas in this flow that may cause friction in enterprise use cases. In my next blog, I’ll do an encore to my “The MCP Authorization Spec Is… A Mess for Enterprise” blog post and dig into why Dynamic Client Registration may not be all that it’s cracked up to be. Stay tuned!!
Appendix A: Enabling Anonymous Client Registration
This is not a best practice. We can do this in the sandbox environment for this blog, but for your organization, follow your security best practices.
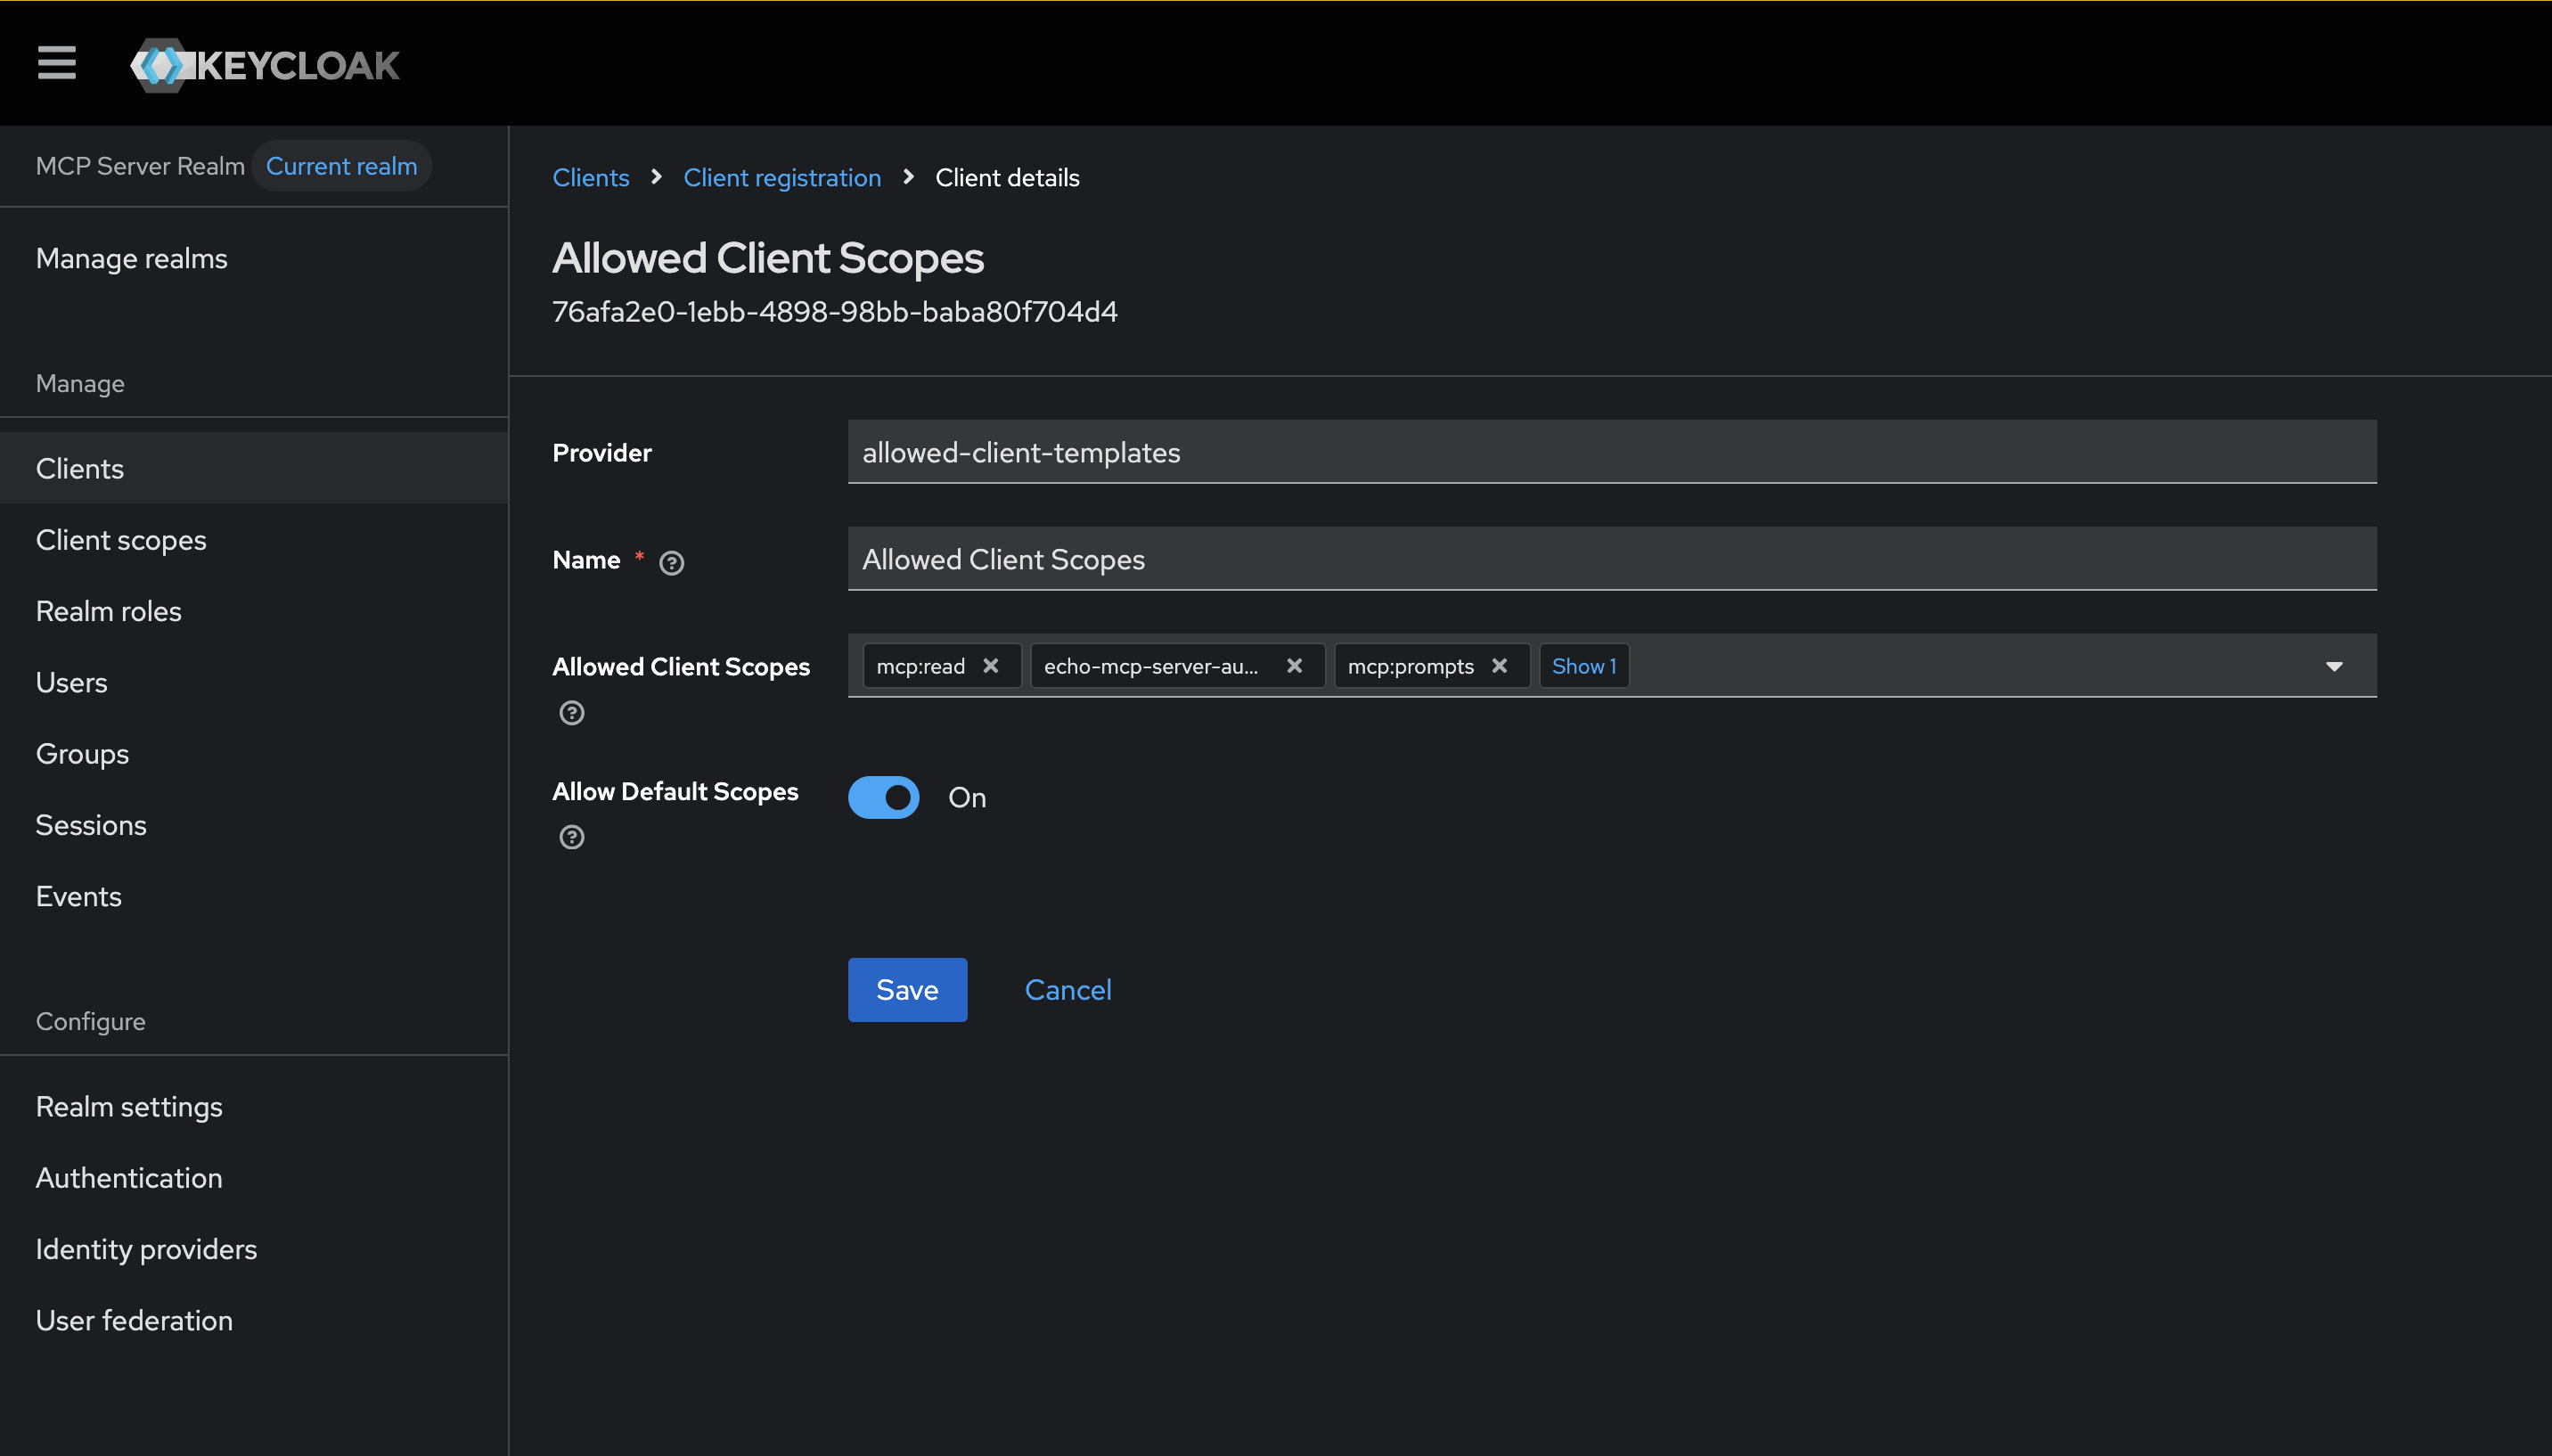
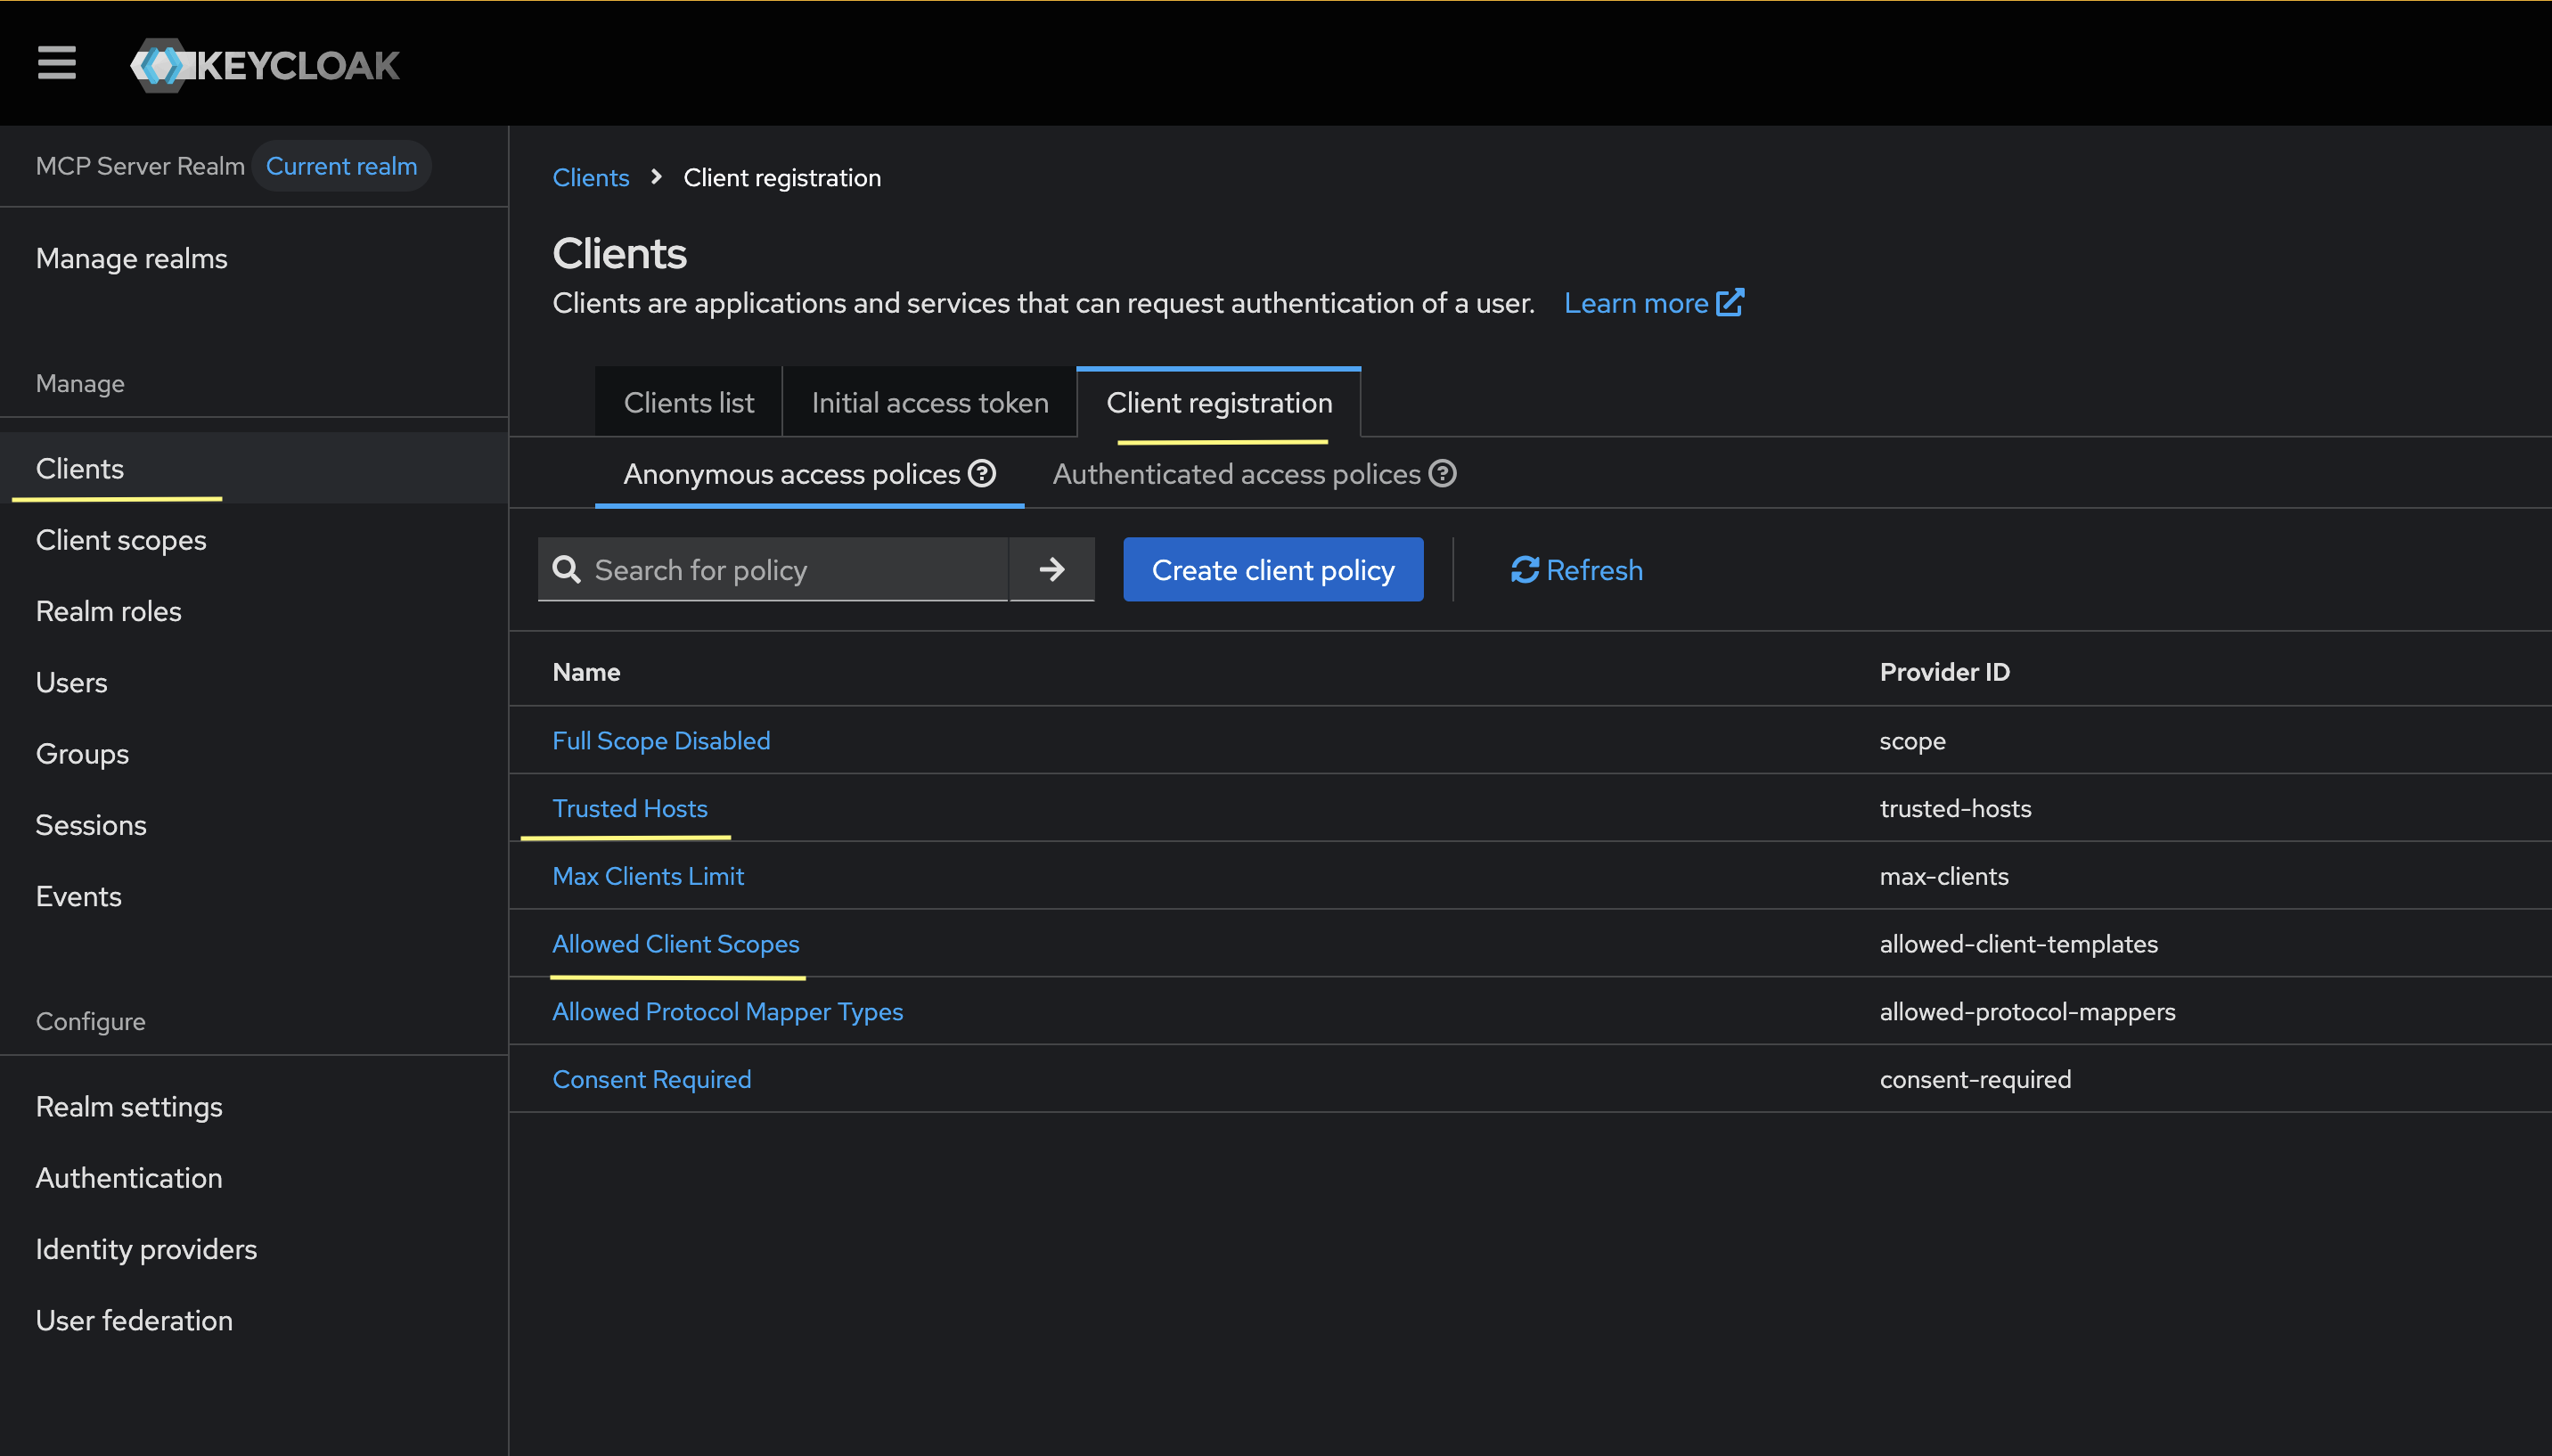
To enable anonymous client registration for our blog post, we will need to configure the “Anonymous access policies”, specifically the “Trusted Hosts” and “Allowed Clients Scopes” policy.
For Trusted Hosts, I will enable my host to be able to call the registration endpoint (check the docker logs to see what the right IP is if it fails):

NOTE: uncheck the “Client URIs must match” checkbox.
Lastly, we need to allow anonymous clients to request the right scopes to make this work: