
HawtIO gives awesome eye candy to your JVM based middleware. It's a unifying console for applications that would otherwise have to build out their own crappy web console; and let's be honest, they're all built differently, differing technology, different UX, and all around a terrible way to try to manage middleware in QA/PROD environments... I can hear the operations folks with the "amen brotha"
![]()
So HawtIO is a nice solution to this problem. It's opensource, Apache 2.0 Licensed, and has a great community behind it Written using AngularJS and a nice plugin architecture, you can extend it to your hearts content for your own personal applications.
You may have noticed that it's also the awesome console for Fabric8 which is the open DevOps platform for JVM middleware -- it makes managing your deployments, configuration, versioning, discovery, load balancing, etc easier for your middleware.
But what options do you have for using HawtIO today?
Many!
HawtIO is really just a web application that runs in a JVM. So here are your options:
- Deploy it as a WAR in your favorite servlet container (Tomcat, Jetty, JBoss Wildfly/EAP)
- Deploy it stand alone as an executable java application
- Use the HawtIO Chrome extension to plug into your apps directly from your browser
Take a look at the Getting Started page for more details about using HawtIO deployed in the different configurations.
HawtIO has excellent plugins for configuring, managing and visualizing Apache ActiveMQ brokers, Apache Camel routes, Apache Karaf OSGI bundles/services/config and a lot more like Tomcat, Wildfly, Jetty, ElasticSearch, jclouds, etc,etc. For example, to manage ActiveMQ brokers, take a look at my buddy Dejan's blog post.
As we at Red Hat roll out JBoss Fuse and JBoss Fuse Serviceworks, we're getting better at integrating the individual components. For example, a Fuse Service Works subscription gives you full access to A-MQ, Fuse, and all of its components, including HawtIO. Unfortunately, HawtIO isn't "officially" supported in EAP as of today, but that will be fixed in next releases. It's not a limitation of the technology, it's just there's so much there and Red Hat has stringent testing/compatibility requirements so we need to have all of the testing/certification done before we "support it" fully.
BUT... there's really no reason to not use it anyway (at least Development and QA), while we wait for support. And there are lots of people already doing that. Just remember, it's not officially supported yet!

So the rest of this blog is a step-by-step guide with best practices for getting HawtIO deployed and secured on your JBoss Wildfly 8.1 application server. The next entry (Part II) will show the same for JBoss EAP 6.2 distribution. I will use HawtIO 1.4.11 (latest release from the community) for this guide.
Getting Started
First of all, the assumption is that you know where to download Wildfly 8.1. But to get started here, we will want to get the latest HawtIO distribution (1.4.11 at the time of this writing) . We will be using the hawtio-default-1.4.11.war to be specific. Once you've downloaded the distro, consider this next step:
1. Remove the log4j.properties file
We will want to remove the log4j.properties file that comes with the distro because we will want to use JBoss Wildfly's built in logging facility which automatically plugins into the log4j logs that HawtIO writes to. If we didn't remove the log4j.properties, we'd want to set the per deployment logging to false.. But since it's not that difficult, let's just remove the log4j.properties (NOTE: You should see the wildfly documentation on its logging component to get more information about the flexibility of the logging subsystem)
ceposta@postamachat(renamed) $ ll
total 50936
-rw-r--r--@ 1 ceposta  staff    25M Jul 25 14:00 hawtio-default-1.4.11.war

ceposta@postamachat(renamed) $ unzip -l hawtio-default-1.4.11.war \
         | grep log4j.properties

     1268  07-13-14 17:23   WEB-INF/classes/log4j.properties

ceposta@postamachat(renamed) $ zip -d  hawtio-default-1.4.11.war \
          WEB-INF/classes/log4j.properties

deleting: WEB-INF/classes/log4j.properties
2. Rename the distro
We will want to rename the distro to make it easier to go to the webapp once it's deployed. Note, this is not a mandatory step, but a nicety that makes it easy to use:
ceposta@postamachat(renamed) $ mv hawtio-default-1.4.11.war hawtio.war
Now when we deploy the WAR file, we'll be able to hit the context like this:
http://localhost:8080/hawtio
instead of having to worry about the version number.
3. Relax the CDI subsystem
HawtIO does use some CDI annotations (@Inject for example) but by default doesn't include a beans.xml file. Wildfly 8.1 does not like this by default per the CDI 1.1 spec which introduces implicit bean archives. We can tell Wildfly to ignore this webapp as a CDI app since it doesn't have the beans.xml included, and we can effectively disable implicit bean archives. To do this, edit your configuration file (we'll use standalone.xml but if using domain mode, edit appropriate config files for that):
353         ....
354         <subsystem xmlns="urn:jboss:domain:weld:2.0" \
                       require-bean-descriptor="true"/>
355     </profile>
4. Purposefully disable Security
We want to make sure the webapp deployed correctly and you can access all of the HawtIO goodies. So we'll temporarily _disable_ security on the webapp so we can access it. To do this, add this section after the `<extensions/>` section:
    31     <system-properties>
    32         <property name="hawtio.authenticationEnabled" \
                                          value="false" />
    33     </system-properties>
We will restore security in a later section
5. Deploy HawtIO
Now you're ready to deploy HawtIO!
If you've just freshly unpacked the Wildfly distro, you'll want to add some users to your Management and Application realms:
ceposta@postamachat(wildfly-8.1.0.Final) $ ./bin/add-user.sh

What type of user do you wish to add?
 a) Management User (mgmt-users.properties)
 b) Application User (application-users.properties)
(a):

Enter the details of the new user to add.
Using realm 'ManagementRealm' as discovered from the existing property files.
Username : admin
The username 'admin' is easy to guess
Are you sure you want to add user 'admin' yes/no? yes
Password recommendations are listed below. To modify these restrictions edit the add-user.properties configuration file.
 - The password should not be one of the following restricted values {root, admin, administrator}
 - The password should contain at least 8 characters, 1 alphabetic character(s), 1 digit(s), 1 non-alphanumeric symbol(s)
 - The password should be different from the username
Password :
Re-enter Password :
What groups do you want this user to belong to? (Please enter a comma separated list, or leave blank for none)[  ]: admin
About to add user 'admin' for realm 'ManagementRealm'
Is this correct yes/no? yes
Added user 'admin' to file '/Users/ceposta/dev/eap/wildfly-8.1.0.Final/standalone/configuration/mgmt-users.properties'
Added user 'admin' to file '/Users/ceposta/dev/eap/wildfly-8.1.0.Final/domain/configuration/mgmt-users.properties'
Added user 'admin' with groups admin to file '/Users/ceposta/dev/eap/wildfly-8.1.0.Final/standalone/configuration/mgmt-groups.properties'
Added user 'admin' with groups admin to file '/Users/ceposta/dev/eap/wildfly-8.1.0.Final/domain/configuration/mgmt-groups.properties'
Is this new user going to be used for one AS process to connect to another AS process?
e.g. for a slave host controller connecting to the master or for a Remoting connection for server to server EJB calls.
yes/no? no
You can now start up Wildfly and deploy HawtIO! Fire up Wildfly:
ceposta@postamachat(wildfly-8.1.0.Final) $ ./bin/standalone.sh
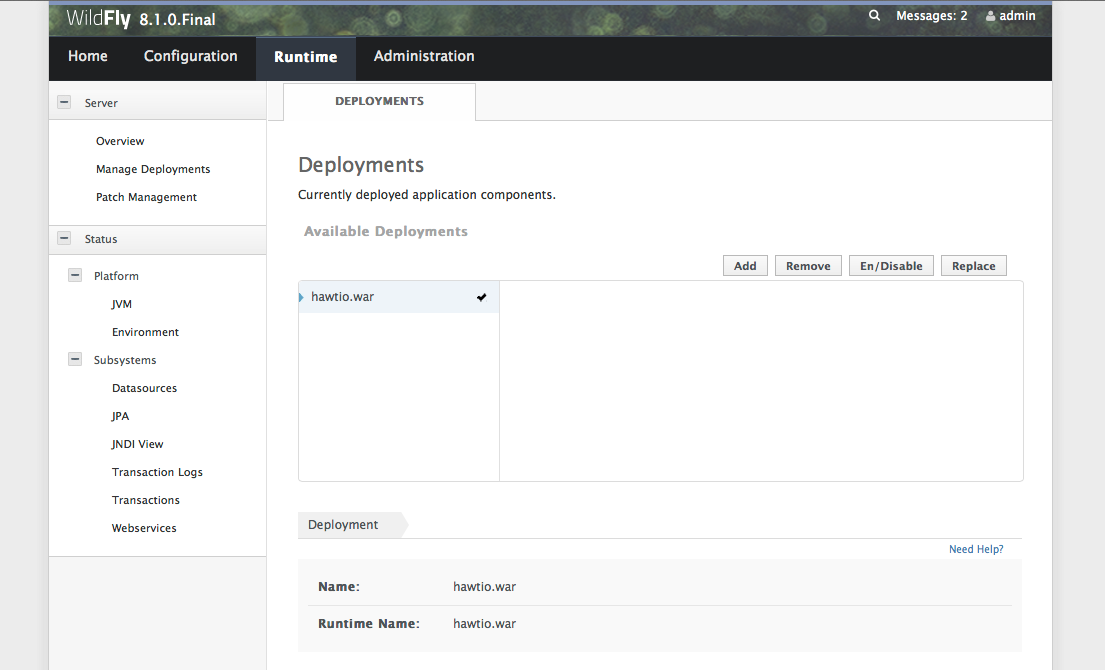
And navigate to the web console. Use the username and password you set up in the add-user section above to gain access to the webconsole. You can access the web console by navigating to http://localhost:9990/. Now, click on the Runtime tab and then Manage Deployments. Click "Add", navigate to where you downloaded, and renamed, the HawtIO distro. Once you've added it, you should click the "Enable" button to enable it. You should have a screen that looks like this:
6. Use HawtIO!
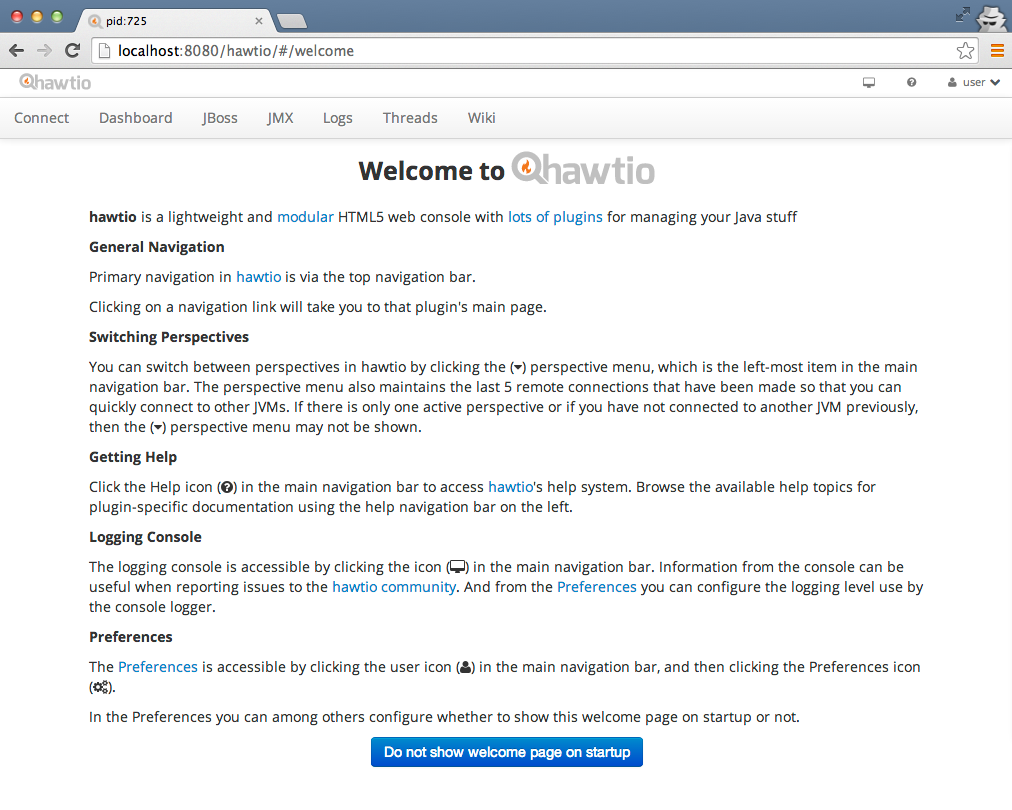
Now you should be able to go to http://localhost:8080/hawtio and start using HawtIO!
NOTE.. There seem to be some issues with security/login being respected on Safari on a Mac. It seems to prompt you for un/pw. Just try with Chrome or another web browser.
7. Set up Security
So in an enterprise situation, we'll want to secure HawtIO regardless of whether it's Dev or QA environments. To do this, we'll want to tie into Widlfly's security subsystem.
First, let's start by stopping Wildfly and editing the standalone configuration file again. In the same spot where we disabled security, let's re-enable it and add a couple more options. Your <system-properties> section should look like this:
31     <system-properties>
32         <property name="hawtio.authenticationEnabled" value="true" />
33         <property name="hawtio.realm" value="jboss-web-policy" />
34         <property name="hawtio.role" value="admin" />
35     </system-properties>
Awesome! Now let's add a user to be able to login. We'll again use ./bin/add-user.sh for this guide, but most likely in your environments you use more sophisticated security mechanisms (Database, LDAP, etc) than the properties files that's used by default. But nevertheless, let's add a new user to the ApplicationRealm:
ceposta@postamachat(wildfly-8.1.0.Final) $ ./bin/add-user.sh

What type of user do you wish to add?
 a) Management User (mgmt-users.properties)
 b) Application User (application-users.properties)
(a): b

Enter the details of the new user to add.
Using realm 'ApplicationRealm' as discovered from the existing property files.
Username : ceposta
Password recommendations are listed below. To modify these restrictions edit the add-user.properties configuration file.
 - The password should not be one of the following restricted values {root, admin, administrator}
 - The password should contain at least 8 characters, 1 alphabetic character(s), 1 digit(s), 1 non-alphanumeric symbol(s)
 - The password should be different from the username
Password :
Re-enter Password :
What groups do you want this user to belong to? (Please enter a comma separated list, or leave blank for none)[  ]: admin
About to add user 'ceposta' for realm 'ApplicationRealm'
Is this correct yes/no? yes
Added user 'ceposta' to file '/Users/ceposta/dev/eap/wildfly-8.1.0.Final/standalone/configuration/application-users.properties'
Added user 'ceposta' to file '/Users/ceposta/dev/eap/wildfly-8.1.0.Final/domain/configuration/application-users.properties'
Added user 'ceposta' with groups admin to file '/Users/ceposta/dev/eap/wildfly-8.1.0.Final/standalone/configuration/application-roles.properties'
Added user 'ceposta' with groups admin to file '/Users/ceposta/dev/eap/wildfly-8.1.0.Final/domain/configuration/application-roles.properties'
Is this new user going to be used for one AS process to connect to another AS process?
e.g. for a slave host controller connecting to the master or for a Remoting connection for server to server EJB calls.
yes/no? no
Now let's start up the app server again:
ceposta@postamachat(wildfly-8.1.0.Final) $ ./bin/standalone.sh
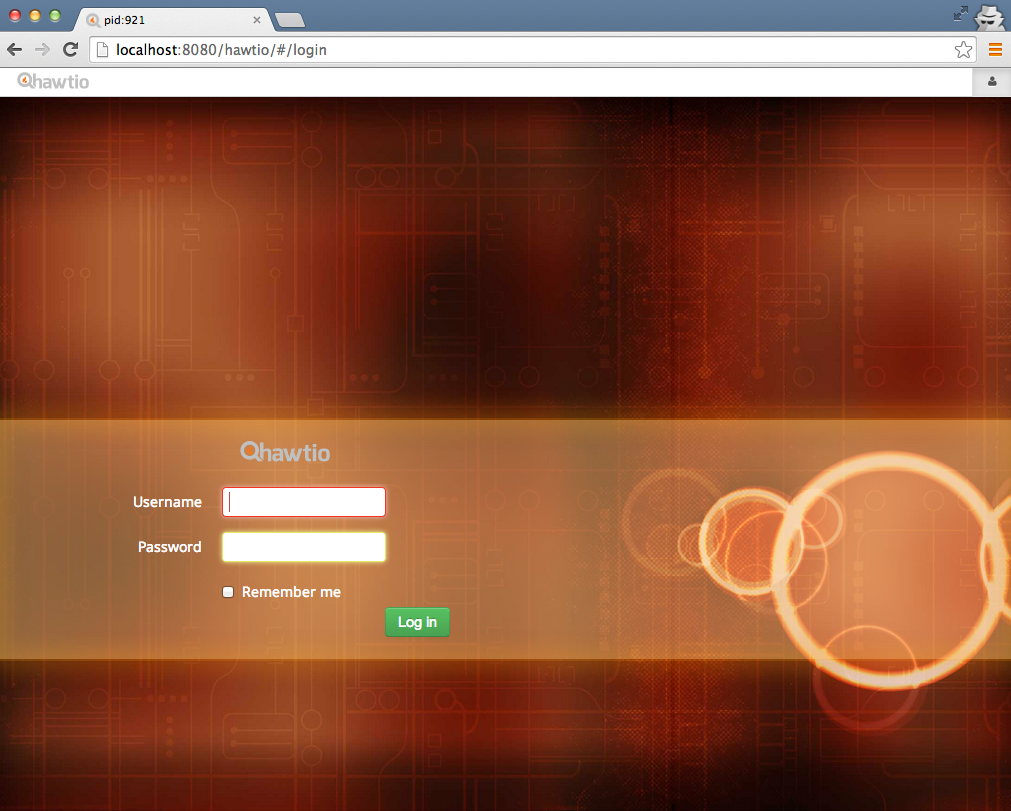
When we navigate to the http://localhost:8080/hawtio endpoint again, we should be greeted with a login page:
What about EAP?
There you have it! You have HawtIO running and secured on Wildfly! You can now check out all the awesome things you can do with HawtIO, especially what you can do with managing, debugging, tracing, profiling, and monitoring Apache Camel routes.
But what about doing the same on JBoss EAP? Stay tuned for the next part... I'll show you exactly how to do that :)